Broken-back Seax
Wherein Ben Potter endevors to explain the processes he uses.
THE BLADE
FORGING
FILING
SANDING
TEMPERING
POLISHING
THE HILT
ROUGH CONSTRUCTION
ENGRAVING
CARVING
MOUNTING
Once I have decided to make a piece I begin by making several rough sketches. If I am
working with a customer then I use the feedback from these sketches to refine the design.
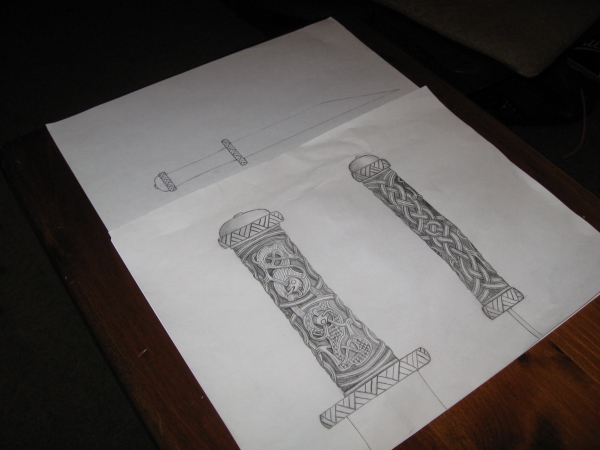 The Final sketches for this project include the profile view and a full-scale rendering of the hilt
THE BLADE
FILING
SANDING
TEMPERING
POLISHING
THE HILT
ROUGH CONSTRUCTION
ENGRAVING
CARVING
MOUNTING
TOP
THE BLADE
FORGING
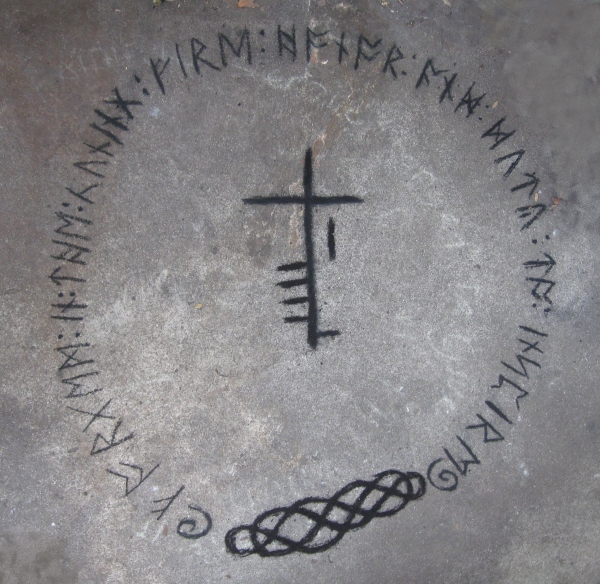
When I begin forging a major piece I write a invocation, on the floor of the shop.
The invocation for this piece is writen in the modified Aglo-Saxon Futhark and reads:
Forged in the cunning fire, honor and duty to inspire.
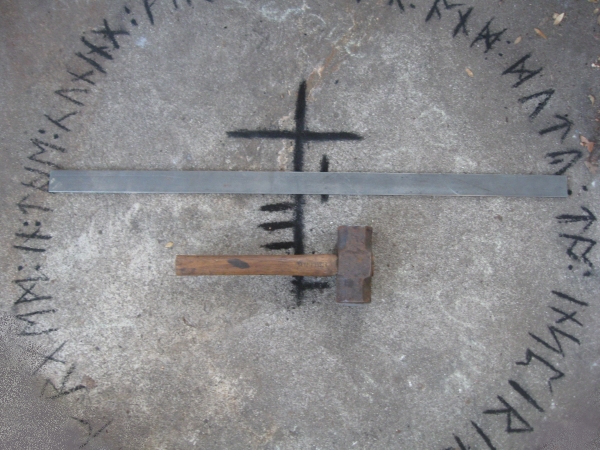
The steel I used for this seax is 1095 3/16x1 1/4" bar stock.
For most of my forging I use a 6 lb. hammer

I mark the important demensions on the anvil so I can check the blade while I'm forging it.
In this case the blade is 15" long and 2" wide.
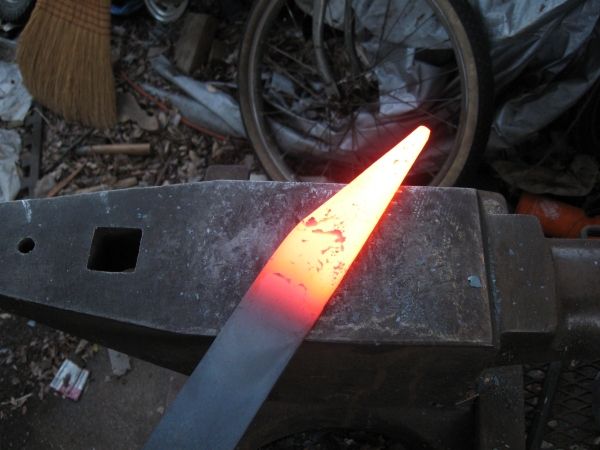
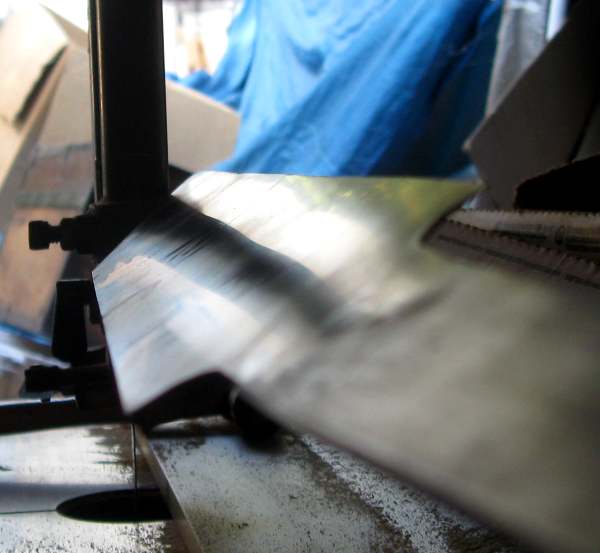
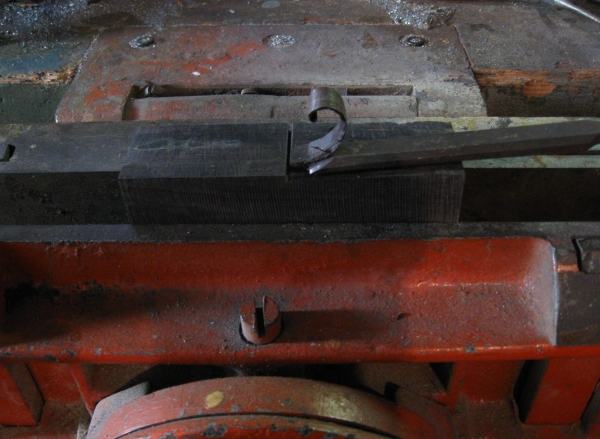
I begin forging by shaping the tip
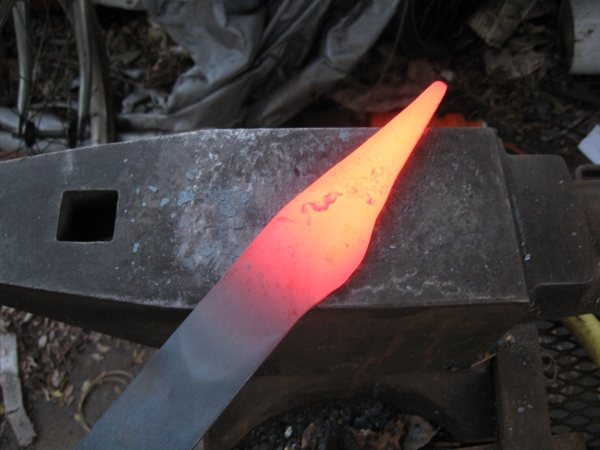
Then I draw out the bevels on the edge

Here you can see how I work the bevels back along the edge a little at a time.
Here the blade has been rough forged.
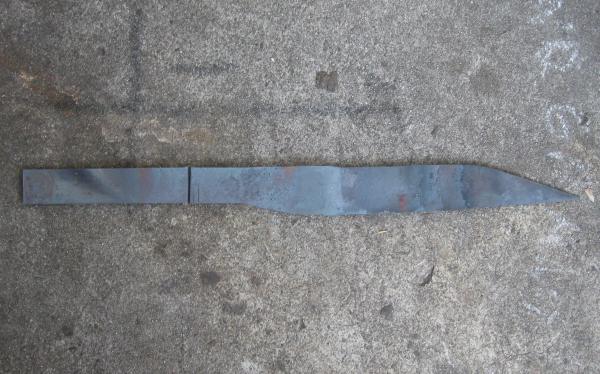
Next I cut the blade from the billet.
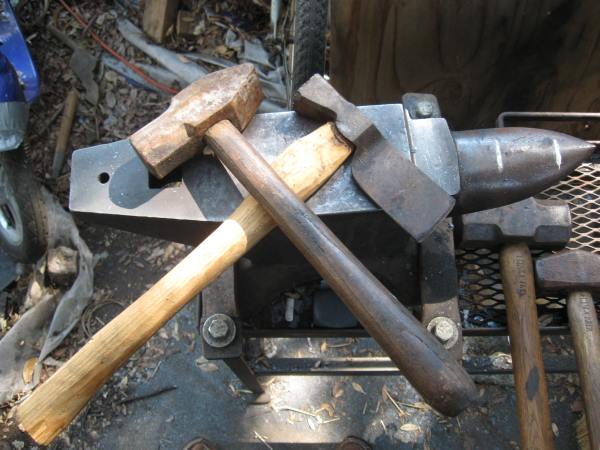
I use a roofing hatchet and a 3 lb. hammer to do the cutting.
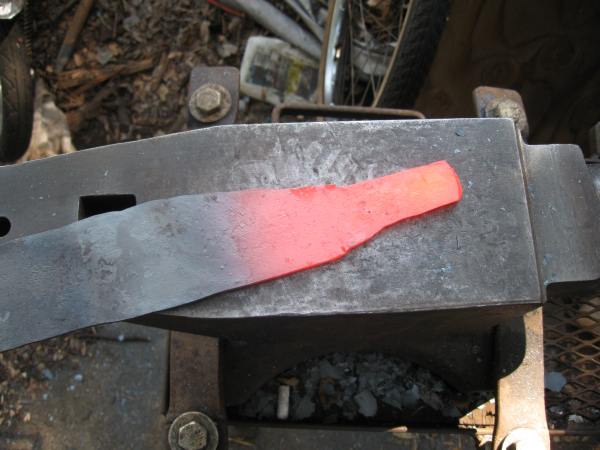
Then I draw out the tang , refine the shape, and straighten the blade.
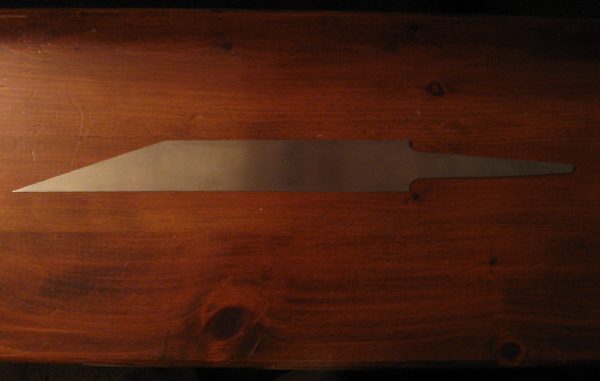
Here is the blade after I've finished the forging process.
THE BLADE
FORGING
SANDING
TEMPERING
POLISHING
THE HILT
ROUGH CONSTRUCTION
ENGRAVING
CARVING
MOUNTING
TOP
FILING
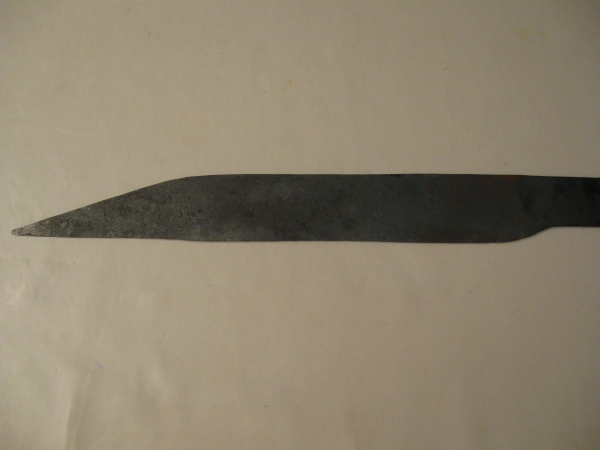
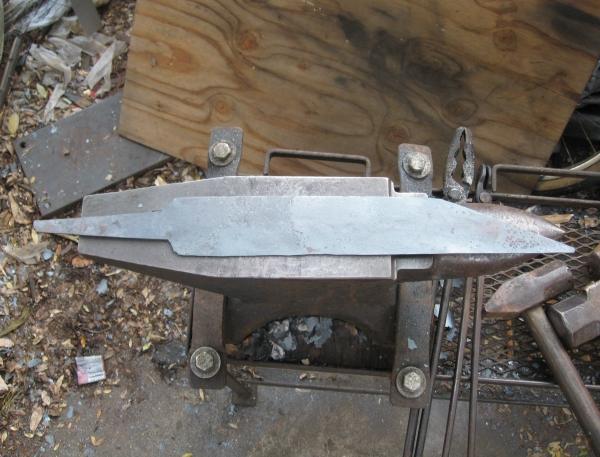
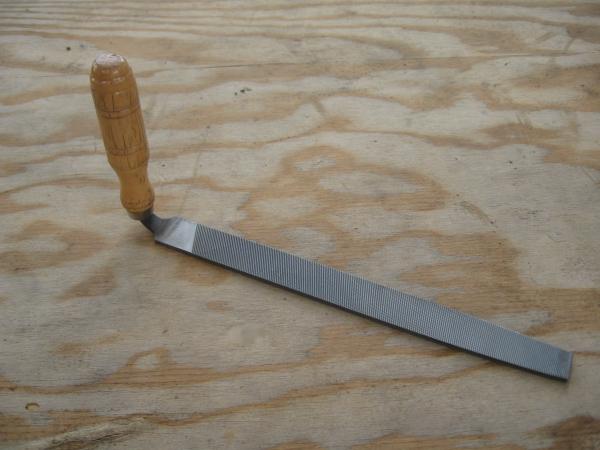
Once the blade is forged to my liking I begin the filing process by defining the profile.

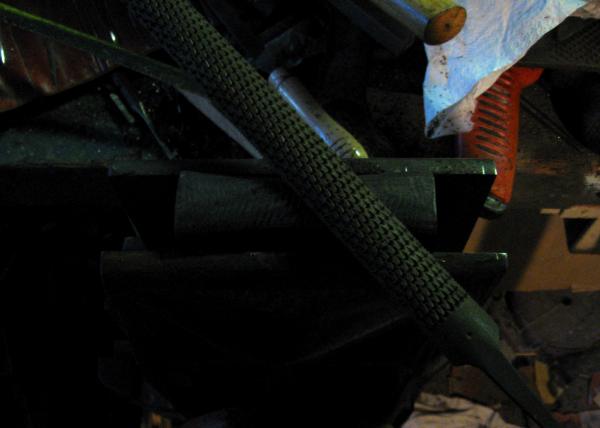
Then I take the fire scale off using an old farrier's rasp, as the scale is very hard on files.
I continue working the faces of the blade with the rasp until they are relatively flat
and close to the final demension I want.
I sight down the blade and mark the high spots with a felt tip pen. Then using
a file I slowly shave the blade down till the marks are gone. I repeat this until
the edge and spine are true, and the faces are flat.
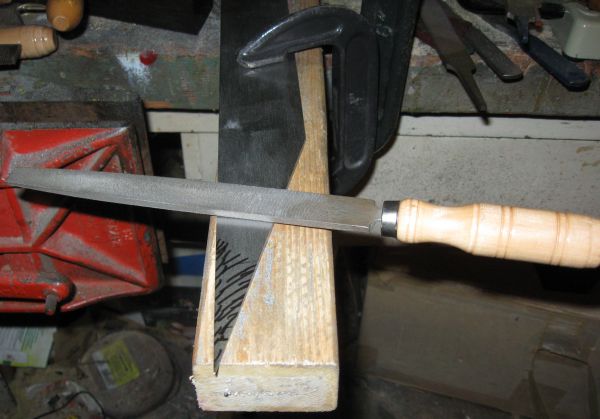
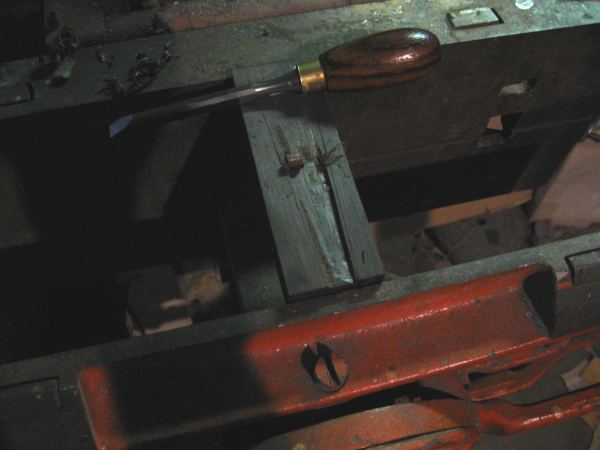
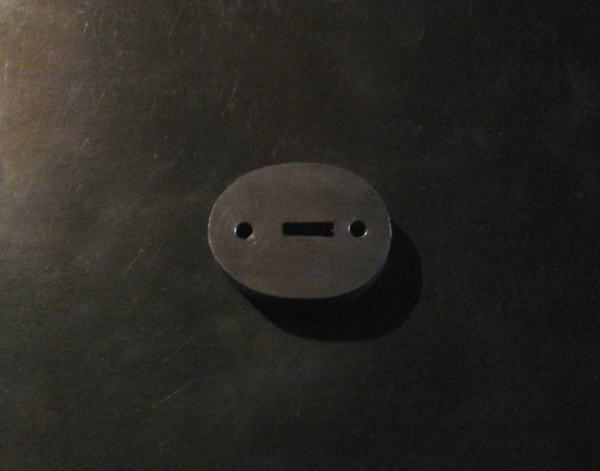
Another method I use to true up the sides is to use the tool pictured above like a wood plane.
THE BLADE
FORGING
FILING
TEMPERING
POLISHING
THE HILT
ROUGH CONSTRUCTION
ENGRAVING
CARVING
MOUNTING
TOP
SANDING
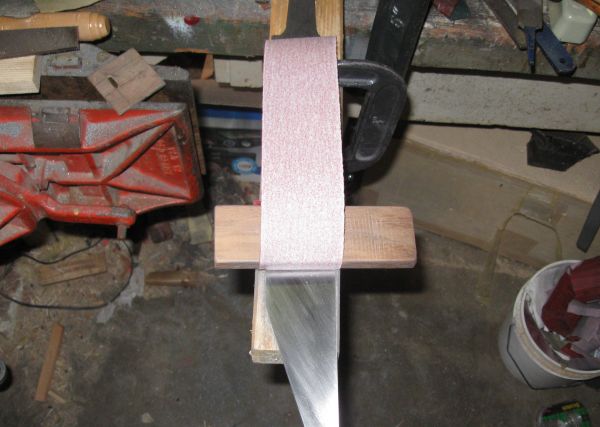
After filing, I beging the polishing process using 150gt sand paper and hardwood
or steel sanding blocks.
I change direction each time I change from filing to sanding or between grits of sand paper.
This insures that all the marks from the previous grit are taken out at each step and
prevents nasty surprises from showing up later on.
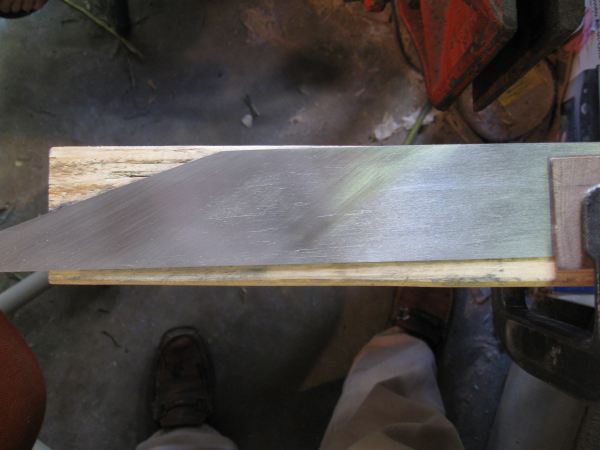
By holding the blade at an angle and looking at the reflection of a straight edge in it
one can see the high and low spots.
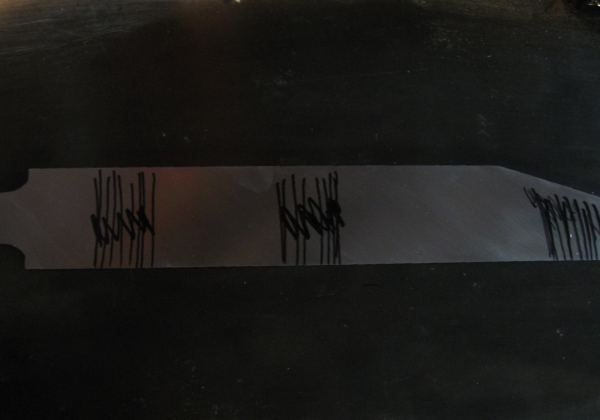
I mark the high spots on the blade with a felt tip marker. The sqiggly lines are the ones
I derw while sighting down it. the straight ones are the ones I'll use as I sand.
After finishing with the rough sanding I polish the blade to 220gt. always making sure the
sanding lines run along the edge to avoid stress risers during the heat treatment. At this
point I make sure the dimensions of the tang are the way I want them, and adjust if need be.
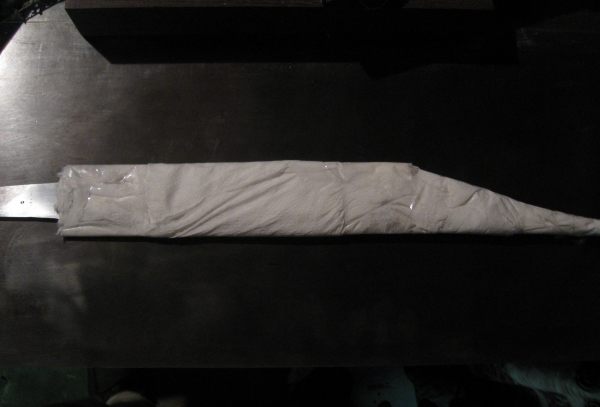
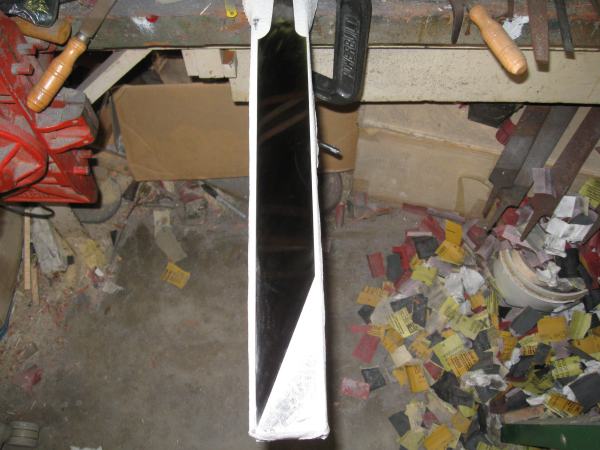
I use a paper towel and packing tape shroud to protect the blade.
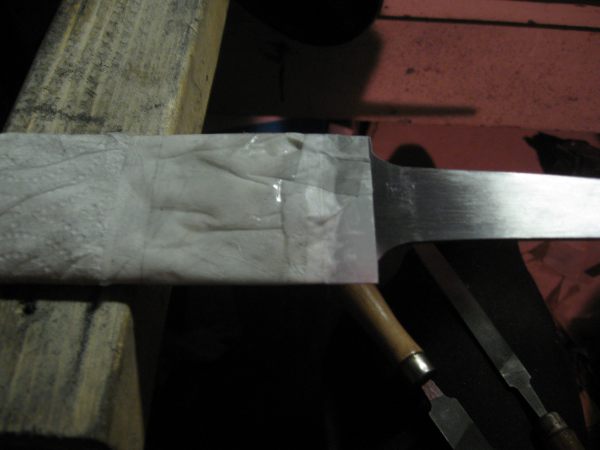
I seal the shroud with scotch tape to prevent grit from getting in and causing scratches
Using curves insted of sharp corners at the junction of the tang and blade greatly
reduces the chances of a blade snaping off at the hilt. It also reduces stress during
the heat treating process.
THE BLADE
FORGING
FILING
SANDING
POLISHING
THE HILT
ROUGH CONSTRUCTION
ENGRAVING
CARVING
MOUNTING
TOP
TEMPERING
For most of my pieces I use a marquench. This is the process I use for marquenching.
First, I normalize 3+ times (bring the blade up to the critical temperature then let it air cool).
Normalizing relieves the stresses put into the blade during forging, filing, and sanding.
Then, I bring the blade up to temperature, about 1600F for this steel. Bringing it up a
bit hotter than needed allows me to get the blade to the quenching tank at the right temp.
Next, the blade is plunged into 450F oil and allowed to cool fully to that temp.
Once the blade is at 450F it is semi-plastic and can be molded by a gloved hand.
As the blade cools it "sings" making a shimmering noise as the martinsite crystals form
and the blade reached its hardend state. Finally, the blade is given 3 one-hour heat cycles
at 475F. This converts more of the steel to martinsite, and releives the stress of the quench.
*A side note: I lost three blades in the HT (heat treatment). Also, a blade of these dimensions
will develop a forward curve during the HT so the final blade was forged with a backwards curve
THE BLADE
FORGING
FILING
SANDING
TEMPERING
THE HILT
ROUGH CONSTRUCTION
ENGRAVING
CARVING
MOUNTING
TOP
POLISHING
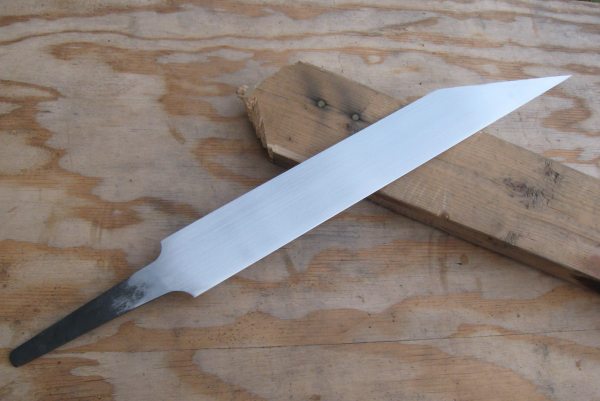
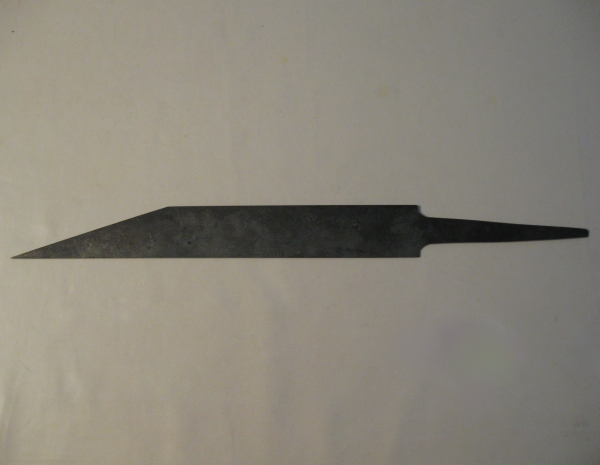
After I finish the tempering process I grind the edge and polish the blade back to 150gt.
At this point I test the blade by flexing it and chopping with it. For this one I choose to cut a
through a 2" x 4".

Once I am satisfied with the blades performance, I continue polishing it using sandpaper.
Starting with 150gt. I use 220gt, 400gt, 600gt, 800gt, and 1000gt which brings the blade
to a good finish. As before I use alternating diagonal and lengthwise strokes with each
different grit.
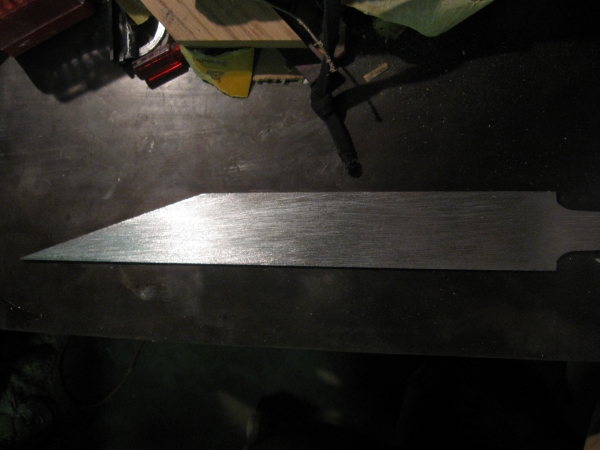
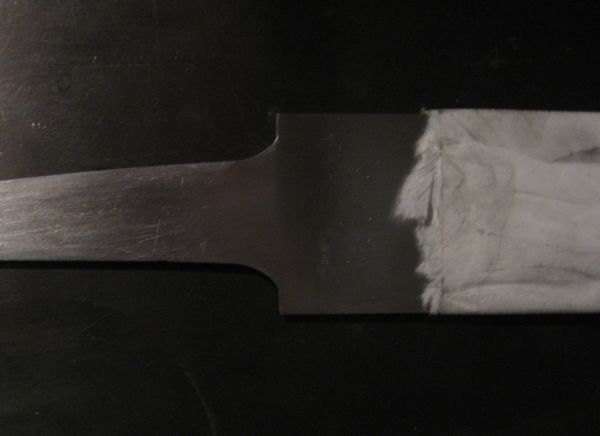
I leave the blade with 1000gt diagonal scraches while I make the hilt and will finish it
afterwards with 1000gt polishing it lenthwise. In the corner you can see the pile of
used sand paper.
THE BLADE
FORGING
FILING
SANDING
TEMPERING
POLISHING
THE HILT
ENGRAVING
CARVING
MOUNTING
TOP
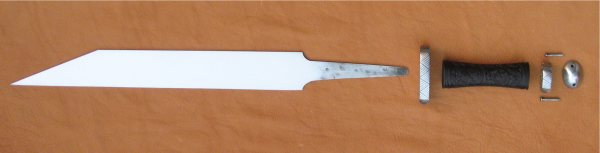
THE HILT
This part of the tutorial is in cronological order rather then by individual pieces.
The reason for roughing out the hilt pieces is to get an idea of what the balance of
the piece is like. At this point I make any ajustments needed to change the balance
to what I want it to be.
The first step in making the hilt is the lower guard (hilts are always described with the
sword pointing down). Here is the bottom of the lower guard with the inlet for the tang
finished. I use the same method to inlet both the upper and lower guards.
It is important when fitting the lower guard to the blade not to have it too tight as that
can cause stress on the top of the tang (the weakest part of the sword) during an impact,
nor is too loose desirable for obvious reasons.
Here is the lower guard fitted to the tang.
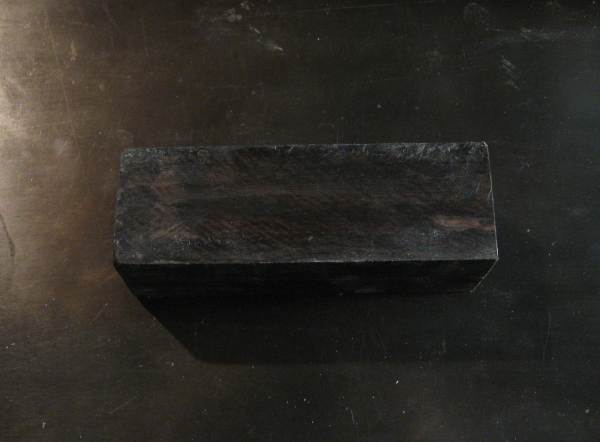
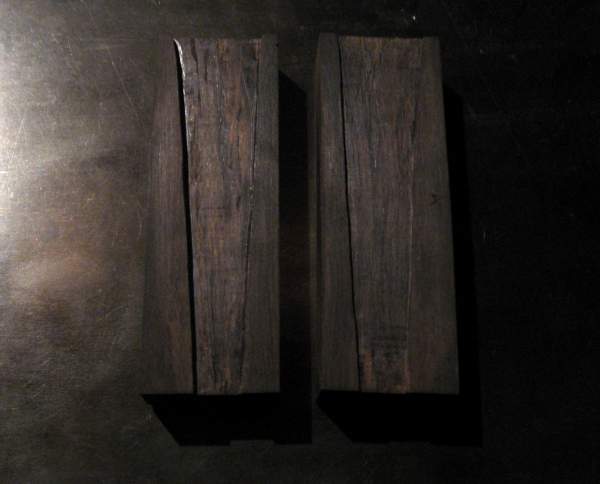
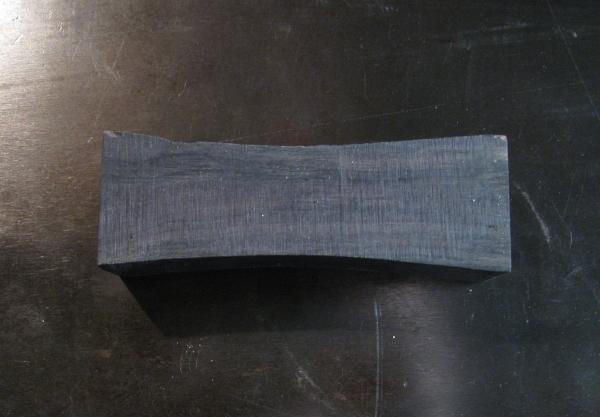
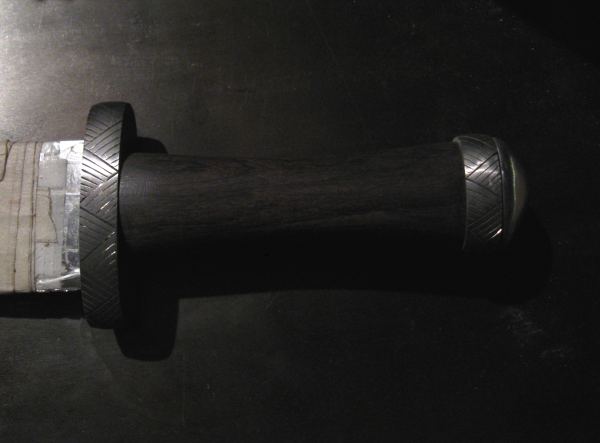
This seax has a solid Afican Blackwood grip. First I cut the blank slightly over size.
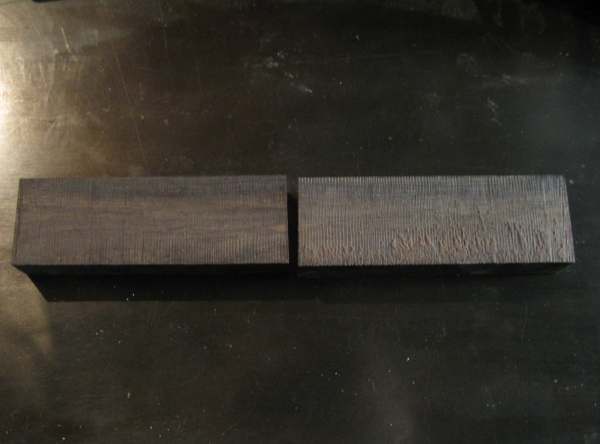
Then saw the blank in half.
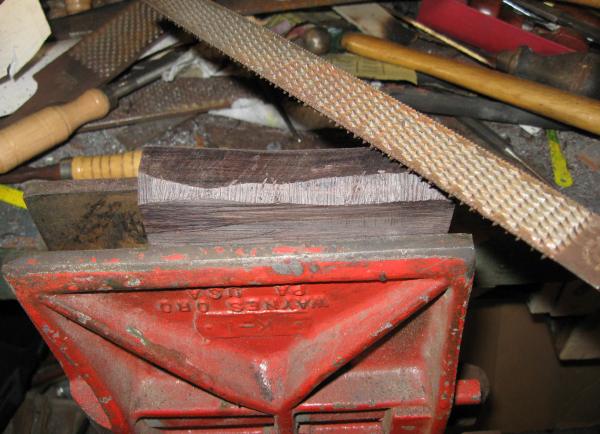
I flatten the insides of the grip using 150gt sand paper on a flat steel suface.
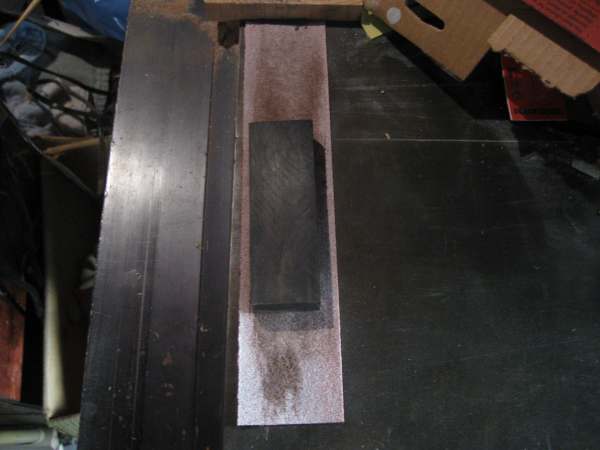
I trace the tang on the inside of the grip. To ensure that the two sides match I inlet
the first side before I trace the second side, I clamp the two sides to gether and
mark the edges of the openings on the second side, then trace the tang being careful to
align the tang with the marks at the top and bottom of the grip.
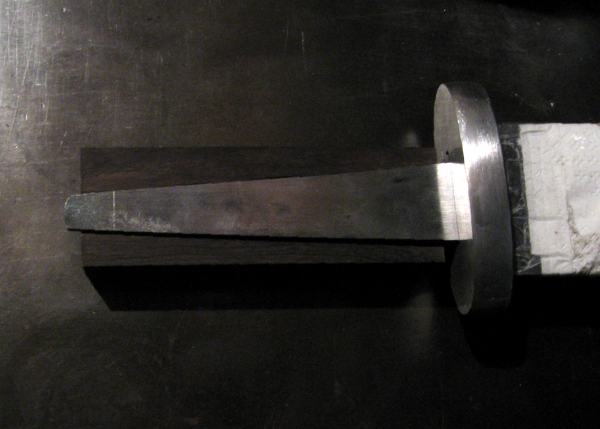
I do the inleting using chisles, Carving out the center part fist then carefully working
out to the edges.
Here is the grip after the inlet is complete.
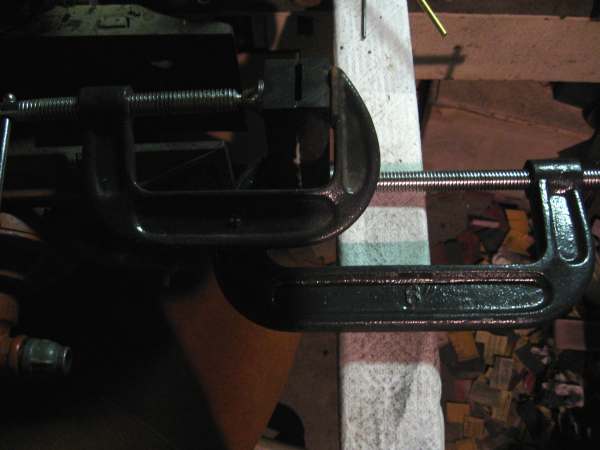
When I glue the two halves of the grip together I use two clamps to give even pressure
along the joint. I use the tang to make sure that the grip pieces stay aligned as the
clamps are tightened, it also keeps the inlet clear as the the eccess glue is squeezed out.
It is important to remove the tang before the glue sets.
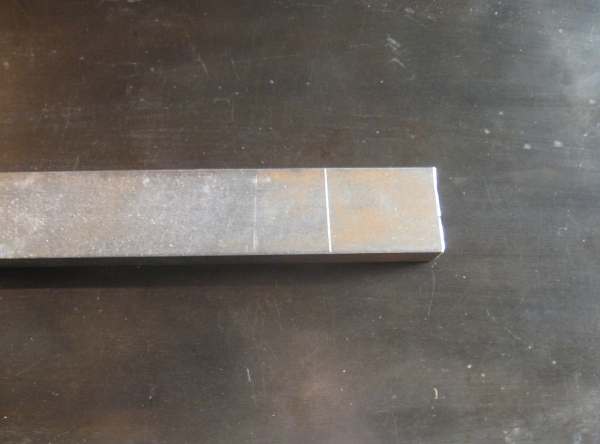
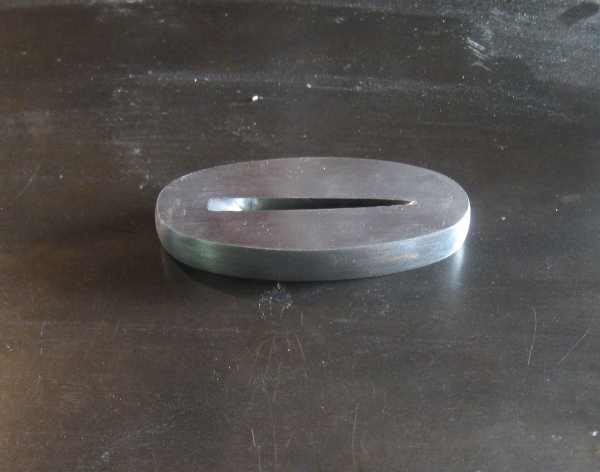
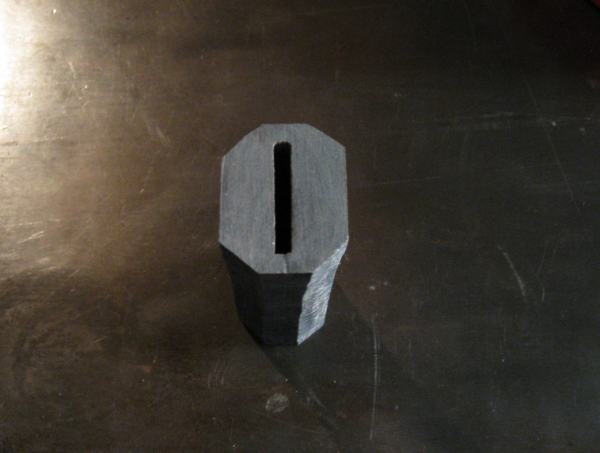
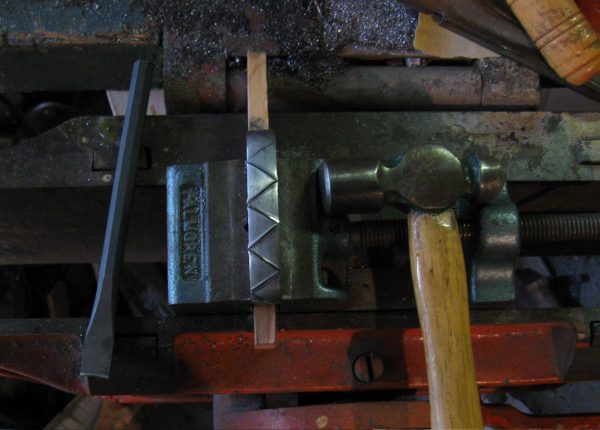
The guards for this piece are made of 1018 steel, I mark the bar using a V-graver, and
use a hack saw to cut blank off the bar. I then cut off the four corners.
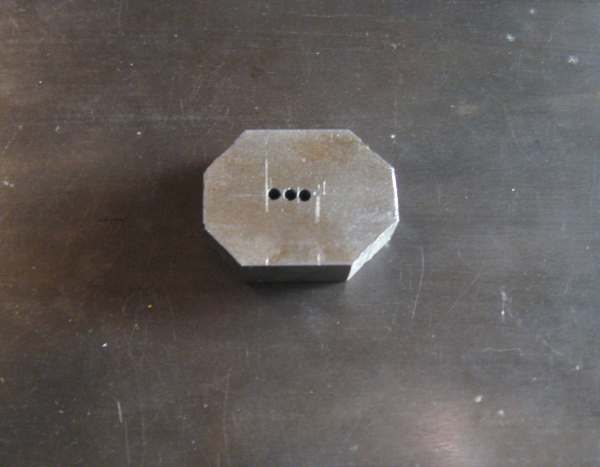
I mark the guard and drill out most of the material from the inlet.
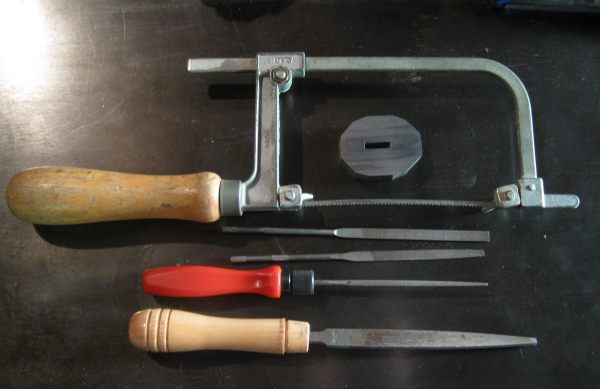
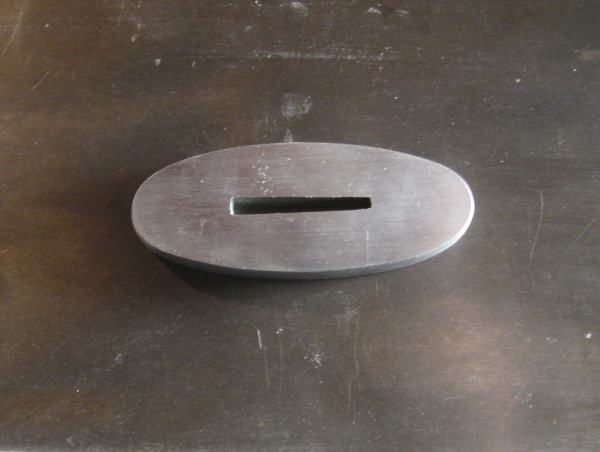
Using a jeweler's saw and asorted files I shape the inlet for the tang.
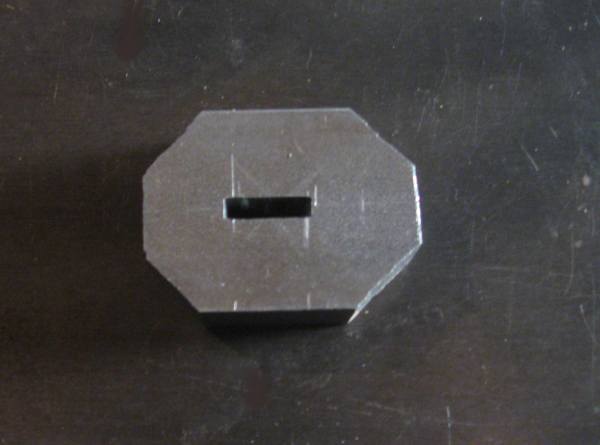
Here is the finished inlet.
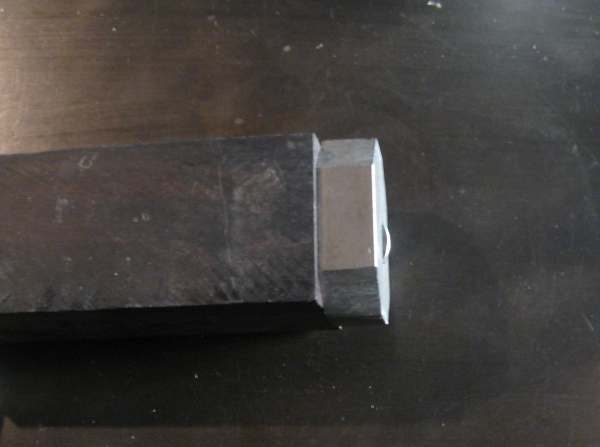
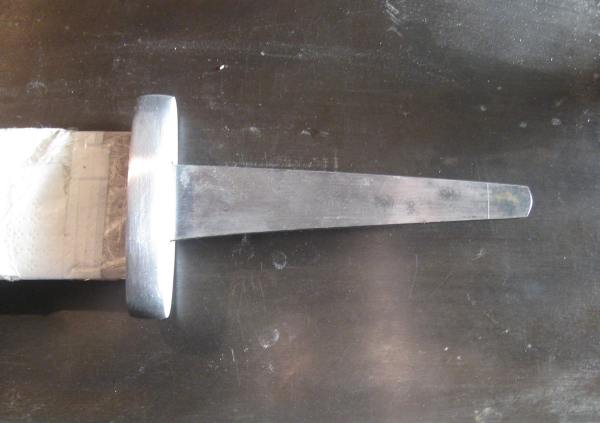
Here is the upper guard in place on the tang.
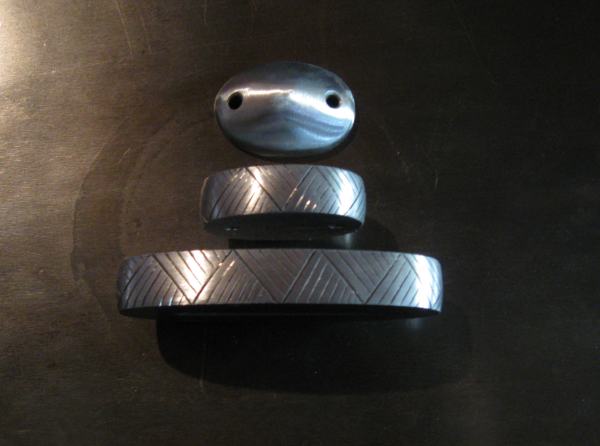
Next I use files to shape the guard. Then I drill the holes for the pommel rivets.
and file the sides round.
After the upperguard is rough shaped I begin to do the rough shaping on the grip.
I begin by cutting the profile. I do this by cutting to the depth I want, then
chisle the off the excess.
Here is the grip after the side profile has been cut.
Next I rasp the corners off the grip.
Here is the bottom of the grip after rasping the corners.

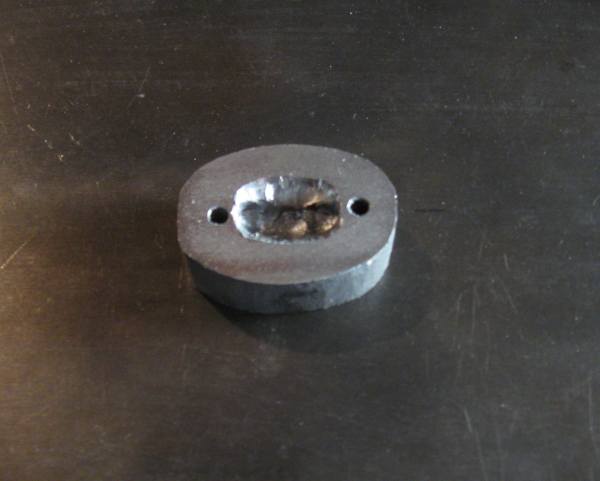
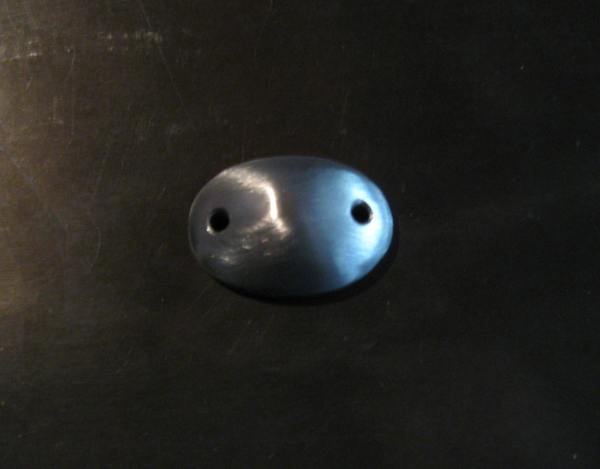
I begin working on the pommel once I have an idea how the balance needs to change. In this
picture I have drilled the first rivit hole and will drill the second one through the
corresponding hole in the upperguard, using the pin for alignment.
The primary function of the pommel is to balance the weapon by adding weight to the end of
the tang. I hollow out the pommel by drilling and chisling, this provides clearance for the
tang as well as improving the balance of the sword.
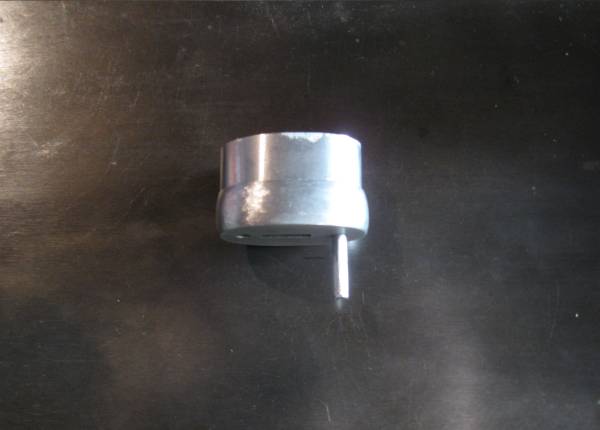
Next I file the pommel to mach the upper guard.
Then I begin to shape the pommel with a hack-saw and files.
Here is the pommel after having been rounded and sanding with 150gt.
Now that I have all the guards roughed out I can shape the grip using chisles, rasps.
THE BLADE
FORGING
FILING
SANDING
TEMPERING
POLISHING
THE HILT
ROUGH CONSTRUCTION
CARVING
MOUNTING
TOP
ENGRAVING
I mark the basic pattern on the steel with a pencil and one it is correct I go over it
with a pen. Then I chisle it out. After the basic pattern is cut I chisle in the details.
Once I've finished cutting the lines I file off the burrs and sand to 220gt.
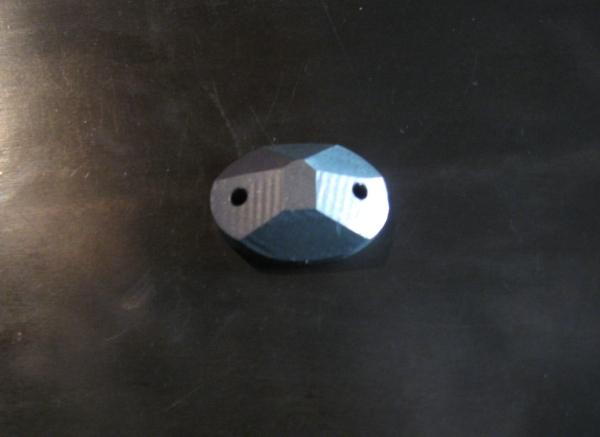
Here are the guards after engraving.
I check the fit of the hilt components and refine the grip if need be.
THE BLADE
FORGING
FILING
SANDING
TEMPERING
POLISHING
THE HILT
ROUGH CONSTRUCTION
ENGRAVING
MOUNTING
TOP
CARVING
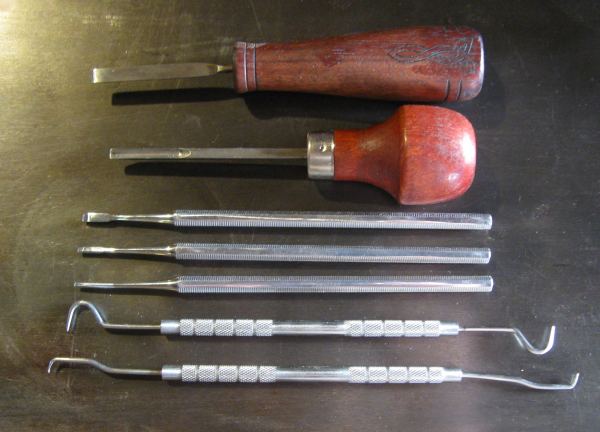
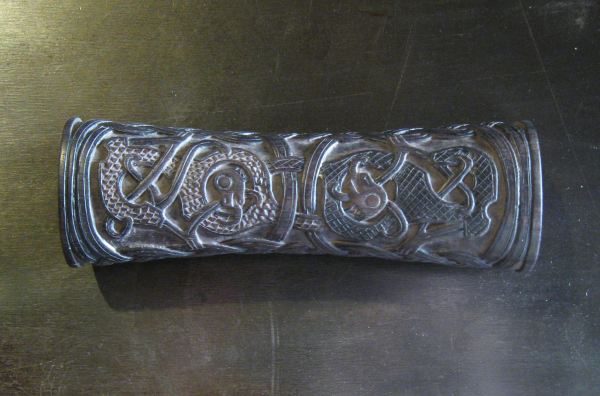
The tools I use for carving are top to bottom:
1/4" flat chisle, 3/16" round gouge, 3/16" flat chisle, 1/8" flat chisle, 1/16" flat chisle,
chisle tipped pick, point and outside chisle pick. 80% of the carving on this piece was
done with the 1/16 chisle.
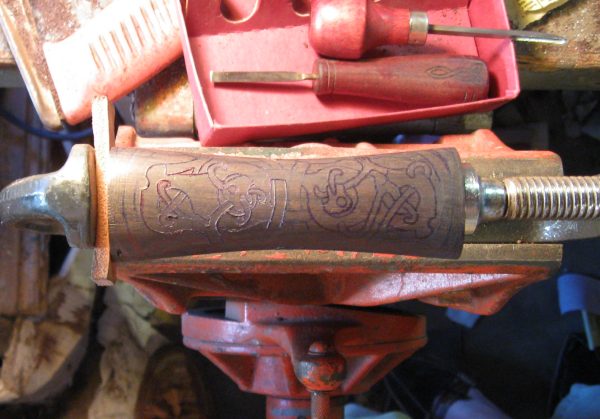
I draw the design out on the piece in pencil then go over the lines with a pen, then cut in
the outline with chisles.
Then chop out the back ground.

Here the background has been cut out and the under-over patterns on the beasts have been defined.
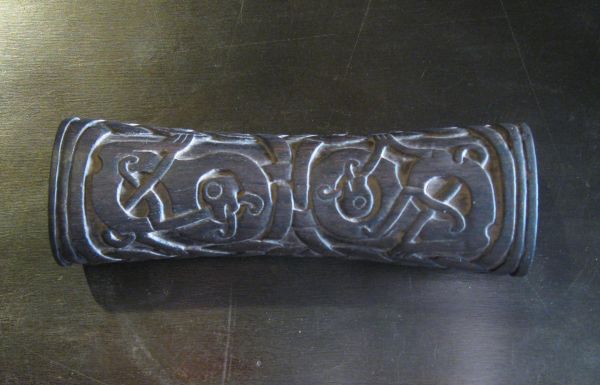
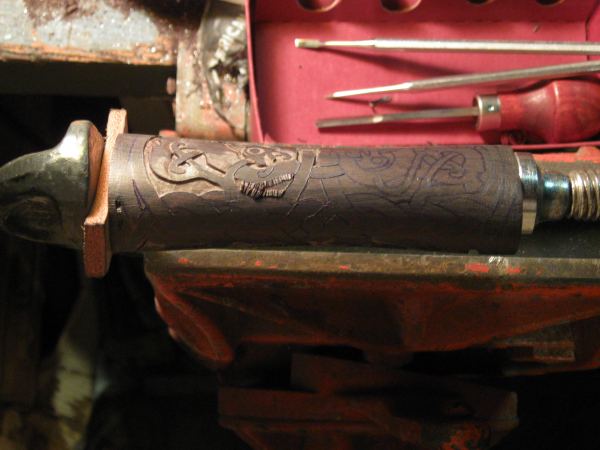
After I've finished the rough carving I use steel wool to smooth the surfaces and see where
I need to take more out. Once everything is smooth I begin the detail work.
On this piece I used two different methods to cut the fine details, the beast on the
left is textured using a 1/8" chisle in the norse chip carving style. The other three
beasts are textured with lines using wood burning techniques.
THE BLADE
FORGING
FILING
SANDING
TEMPERING
POLISHING
THE HILT
ROUGH CONSTRUCTION
ENGRAVING
TOP
MOUNTING
I use traditional methods to mount the blade except that I use epoxy rather then pitch
to seal the hilt and keep mosture from getting between the guards and the blade. Mounting
the blade must be done quickly to avoid having the epoxy set before all the components are on
and the tang is peened. The sequence of mounting the blade is, first the lowerguard is
mounted and sealed with epoxy, the tang inlet in the grip is coated with epoxy and is
placed on the tang, the pommel rivets are placed in the upper guard which is sealed
and placed on top of the grip, and the tang is peened over on it. Peening the tang on
a piece like this where the rivets must be in place is a rather trying task.
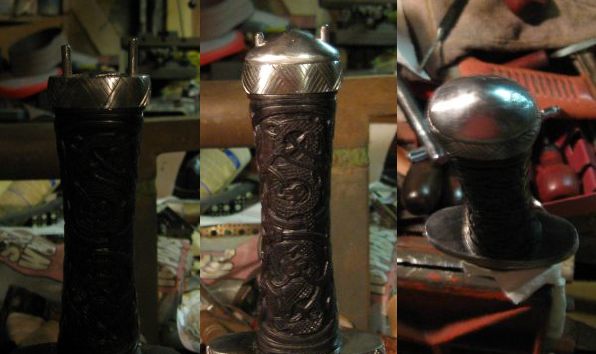
These three images show the riveting on of the pommel. The first shows the upper guard with
the tang peened over on it. The pommel is sealed and hammered on to the rivets which are then
cut about 1/8" above the pommel and peened into the counter sunk holes. the last picture shows
the rivets peened, then the rivets are filed down flush with the pommel and polished to match.
There you have it, I hope that you enjoyed seeing how I work.
You can see pictures of the finished Seax by ckicking on the link below.
OSBERG SEAX
THE END
THE BLADE
FORGING
FILING
SANDING
TEMPERING
POLISHING
THE HILT
ROUGH CONSTRUCTION
ENGRAVING
CARVING
MOUNTING
TOP
HOME
AVAILABLE
PAST WORK
THE PROCESS
PHILOSOPHY
DEDICATION
CONTACT
All images and text
Copyright 2008 Ben Potter