Home About Information & How To's Products Gallery Links Contact
Instructions for a Sling with a Leather Pouch
These instructions are for a basic, functional sling, which is relatively simple to make and is a good sling for beginners. The method for making this sling is the same one that I use for the basic leather slings I sell. I've experimented with different ways of attaching the cords to the pouch, and I've come to prefer this method as it is quite strong and reliable. Just a note on the leather: I'm using veg-tanned leather for this sling which works well for forming a cupped pouch. If you use a different type of leather, you may not be able to form it well, and if that is the case, simply skip the forming instructions when you come to them.
Tools and Materials
For this sling you will need:
A small piece of leather
About 7 feet of parachute cord
About 4 feet of heavy duty waxed nylon thread
Oil for the leather
Scissors
A lighter
A pair of small pliers (optional, but helpful)
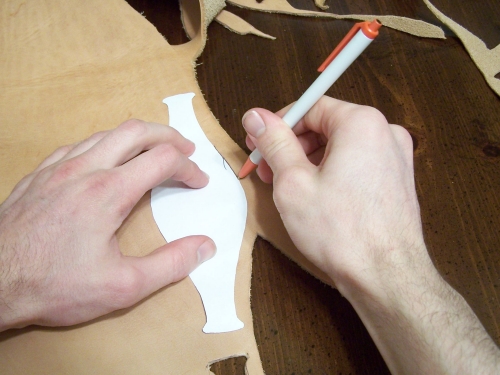
The first step for this sling is to cut out the leather pouch. The overall shape isn't crucial, but for this method, it is important to have the ends of the pouch flare our slightly to keep the cords from slipping off. You can download my pattern here. When you have a pattern, trace it onto the leather.
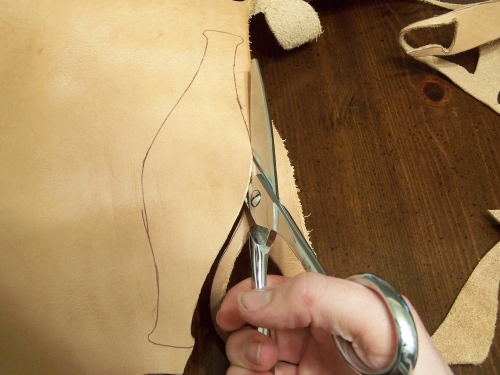
Next, cut out the pouch. A good pair of scissors works fine, but a sharp knife can also be used.

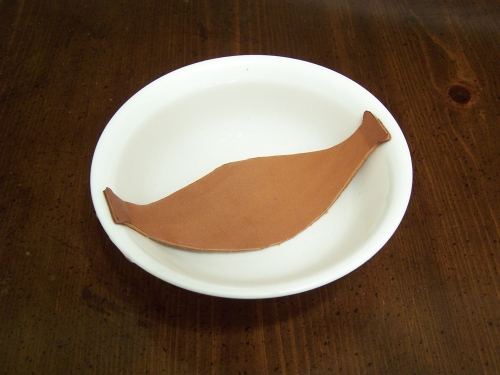
Here is the pouch after being cut out.
I like to give my leather pouches a slightly cupped shape so they will hold ammunition easier. To do this, soak the leather for a minute or two until it is thoroughly wet.
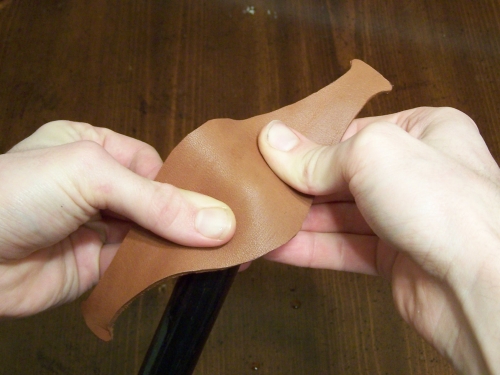
To form the pouch, stretch the middle portion of the pouch, but try not to stretch the edges too much or it won't have the cupped shape; it will only be a slightly larger pouch. I usually stretch the leather against some rounded object, like the end of a broomstick
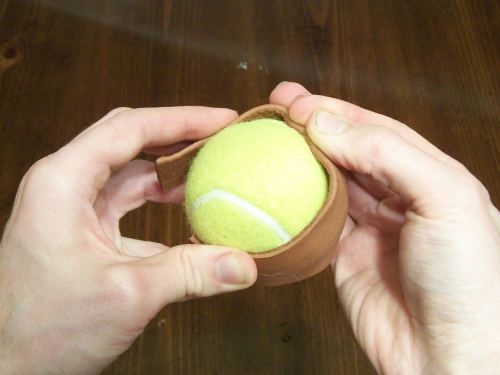
I like to us a tennis ball as a form to shape the leather over. By pushing the edges of the pouch down around the ball, the pouch can be made to conform to the shape of the ball.
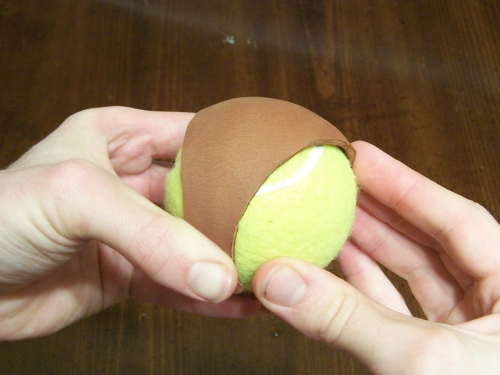
Here you can see the formed pouch. Leave the pouch on the tennis ball, and set it aside to dry. Aside from being about the right size, tennis balls have the added advantage of being somewhat absorbent, which helps the pouch to dry quicker.
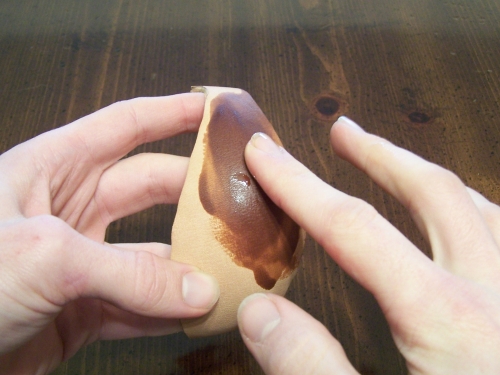
I like to oil my leather pouches, and I usually use olive oil, but there are numerous leather dressings that also work. The oiling is done by hand, and I like to make sure that the whole pouch is evenly oiled all the way through.
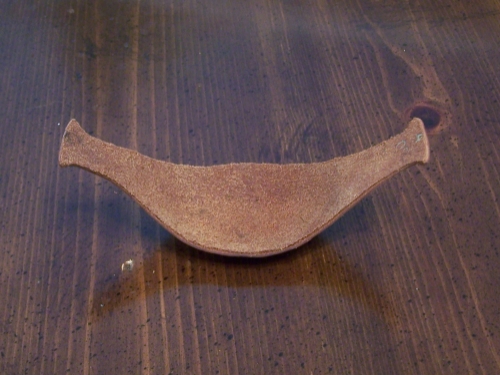
Here is the completed pouch.
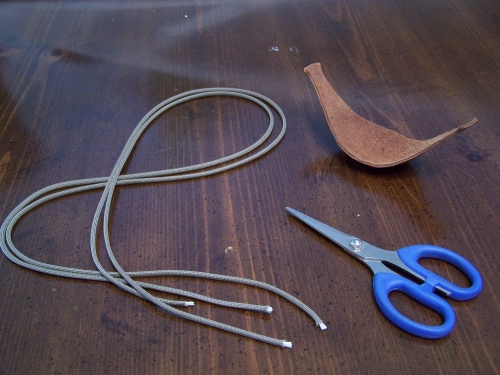
Cut two pieces of parachute cord for the cords. Cut them longer than you want the cords to be to allow enough length to tie the knots, remembering that it is easier to cut the ends shorter when the sling is finished than to add length to the cords. How much longer you cut them depends on how large you want the finger loop and what knots you use. If you use the knots I used here, I'd recommend adding at least 10 inches to the length you want the cords to be.
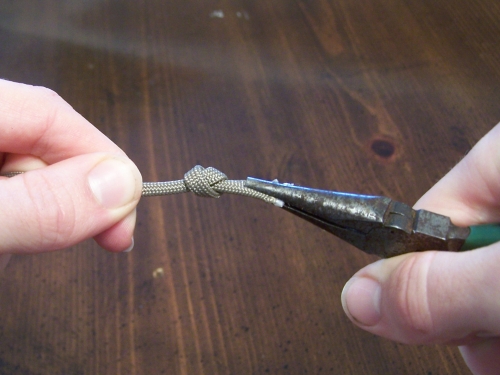
Tie an overhand knot at one end of each cord. It needs to be pulled very tight, and I find pliers are a convenient tool for that job.
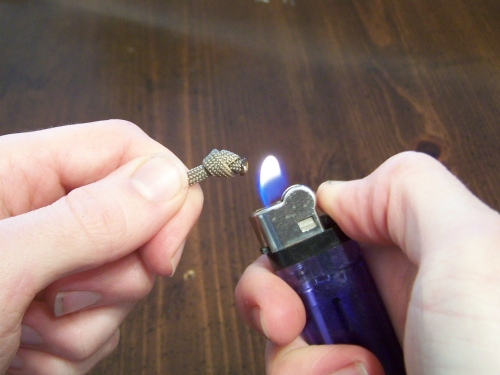
Trim the end of the cord off short, and fuse it with a lighter.
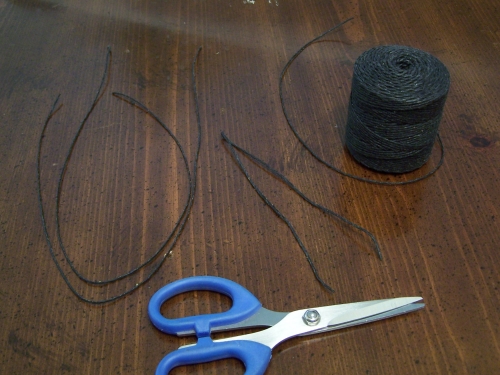
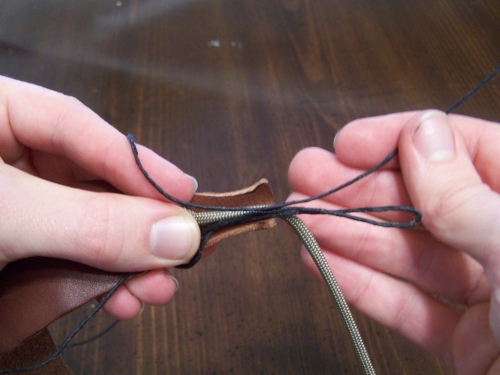
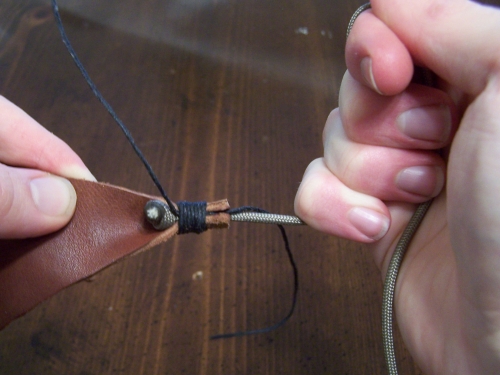
To prepare to tie the cords onto the pouch, cut two 18 in. pieces of heavy waxed nylon thread. Also cut a shorter piece about one foot long.
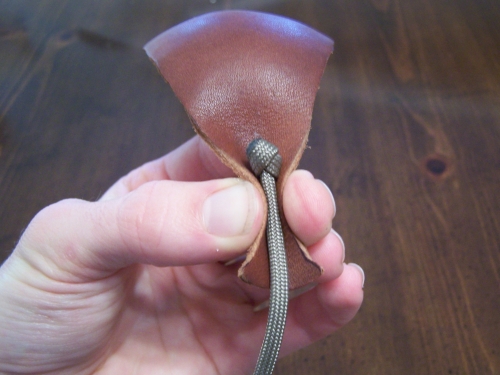
Place the end of one of the parachute cord pieces so that it overlaps one end of the pouch, and fold the pouch up around the cord as shown.
The cords are held on by whipping, and this is the most difficult part of the sling. Take the short piece of thread, fold it in half, and lay it alongside the parachute cord so that the folded end is away from the pouch.
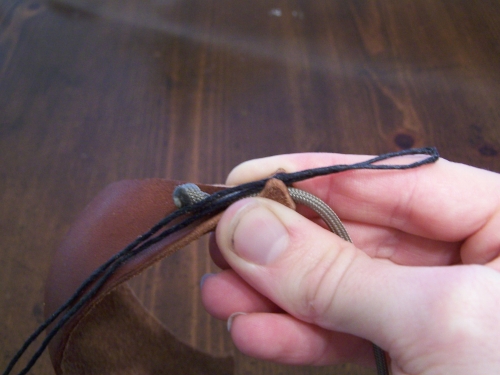
Next, lay one of the 18 in. pieces alongside the cord and folded thread. Lay it so that the end away from the pouch is about 4-5 inches.
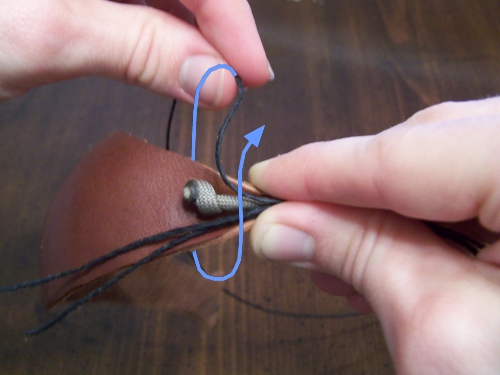
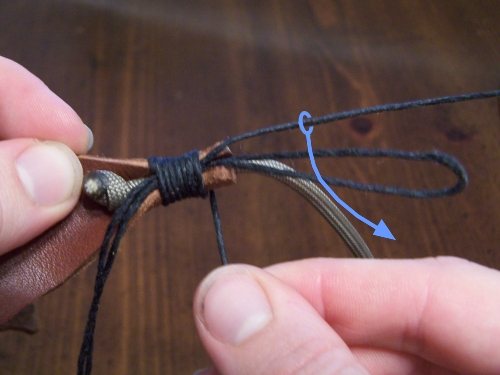
Take the longer end of the thread, and wrap it around the pouch and cord as indicated by the blue arrow.
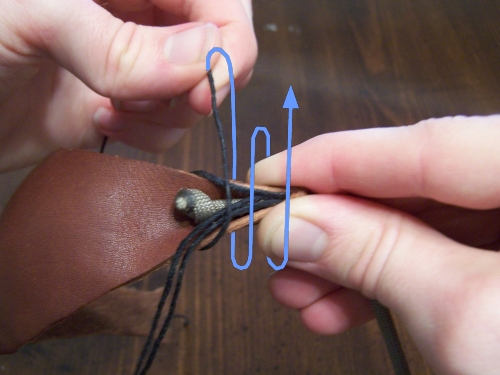
Continue wrapping the thread around the pouch, and around itself going towards the end of the pouch.
As you wrap the thread, be sure to pull it tight.
I typically make a total of 7 wraps, but how many you do may depend on the size of your pouch, and the thickness of your thread. Once all the wraps are finished, take the other end of the thread and bring it across the loop of the folded thread as shown.
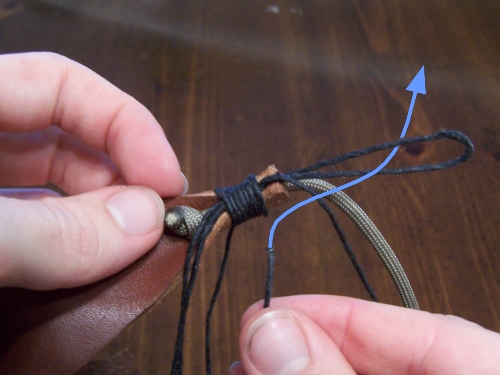
Now bring the wrapped end over the other end and through the loop of the folded strand.
Pull the ends of the folded strand away from the wraps, drawing the wrapped end all the way through the wraps.
Grab both ends of the whipping and pull them tight enough to keep the whipping together, but don't worry about making them too tight yet.
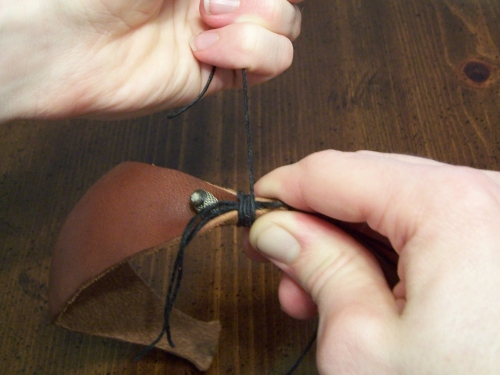
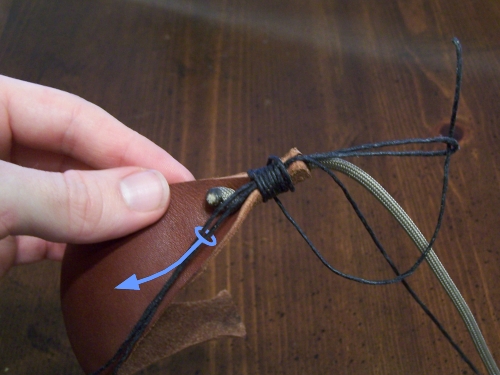
Pull the parachute cord so that the overhand knot is drawn up against the whipping.
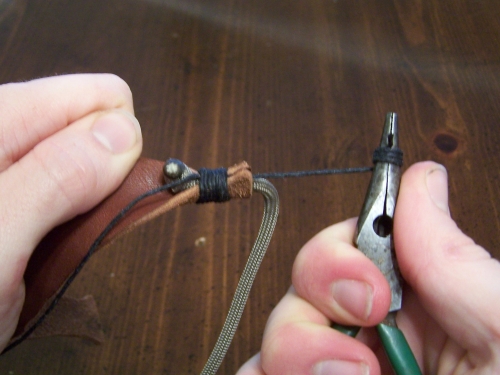
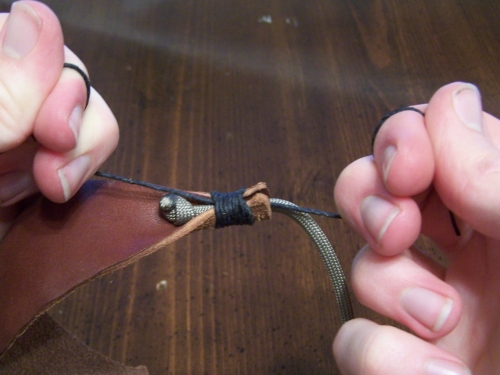
Now hold the pouch in one hand and pull the other end of the whipping as tight as you can. To get a better grip on the thread, I like grab it with a pair of pliers, and take several turns around the jaws of the pliers. Repeat this for the other end by holding the parachute cord and in one hand and the other end of the thread in the other.
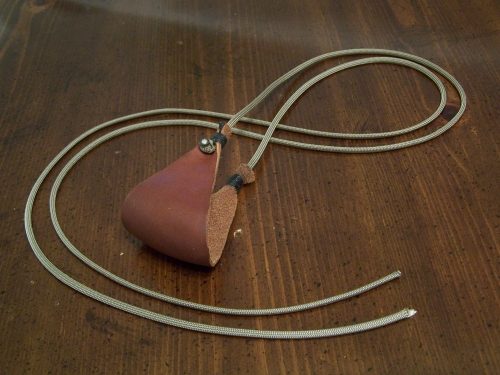
Repeat the whipping process for the other side of the pouch so that both cords are attached.
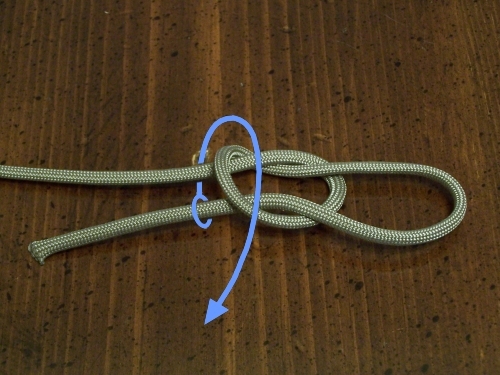
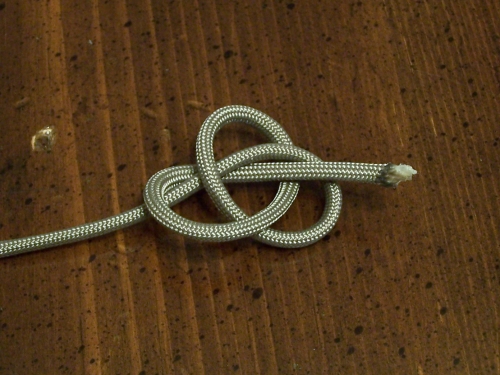
The next step is to tie the finger loop. There are a number of good knots for this purpose, and some are simpler than the True Lover's Knot I show here. I like this knot because it adds a slightly decorative touch to the sling. To begin, tie a slip knot at the end of one of the cords, and adjust it to the approximate place you want the finger loop to be. Then, take the short end of the knot, and bring it around behind the knot as shown by the arrow.
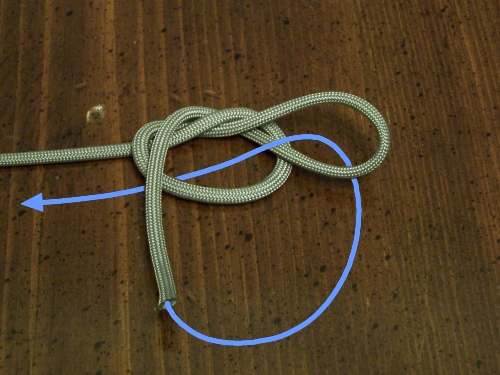
Next, bring the working end up under the loop, and then back through the knot, going over the first two strands of the knot and under the second two, as shown.
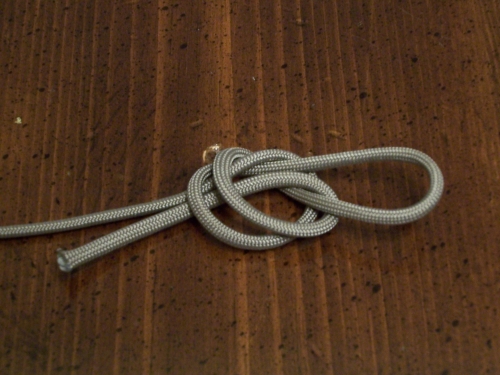
Here is the knot before being tightened. The position of the knot on the cord can be adjusted before it is completely tightened by working short lengths of cord through the knot.

Once the knot is in the right place, tighten it firmly, and cut and fuse the short end to complete the finger loop.
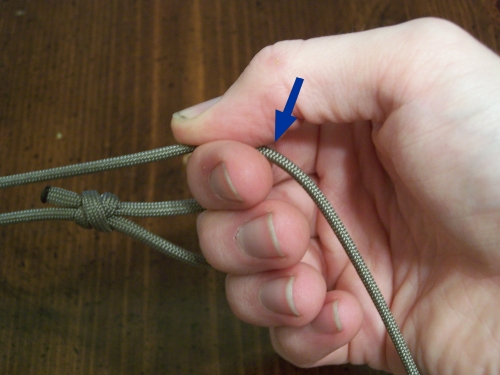
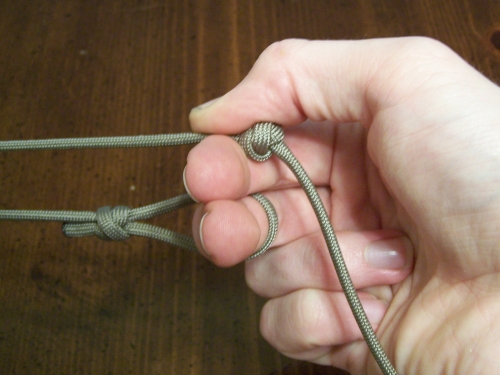
The last step is to tie a small knot for the release knot. To find the correct position for the knot, place the loop on your middle finger (or whichever finger you sling with), and grip the release cord as shown. Hold the center of the pouch with your other hand, and adjust the release cord in your grip until both cords are the same length. In this postition, the place to tie the release knot is just behind where it is held by the index finger, indicated by the arrow.
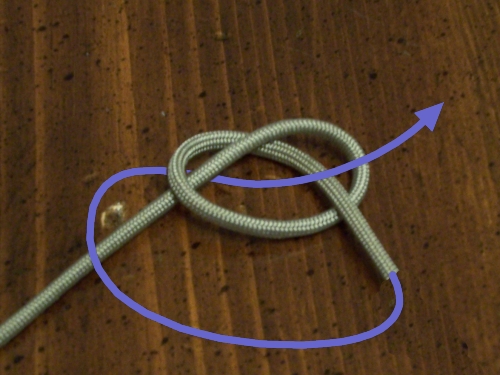
I like to use a Three-Ply Knot for the release knot. To tie one, begin with a simple overhand knot. Then take the working end and bring it around and up through the knot as shown.
Here is the knot before it is tightened.
Check the position of the release knot by holding it the same way as when the proper position was first found. Make any necessary corrections, and tighten it firmly.
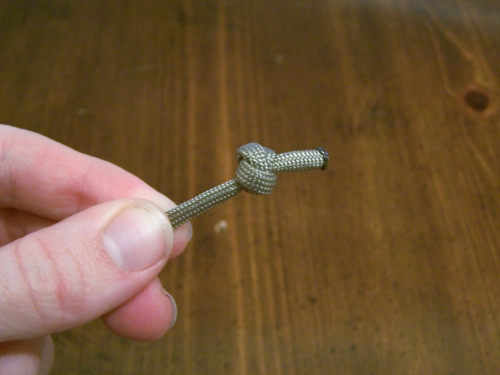
Here is the finished Three-ply knot with the working end trimmed and fused.
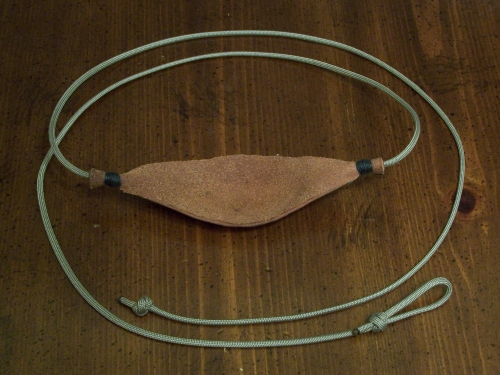
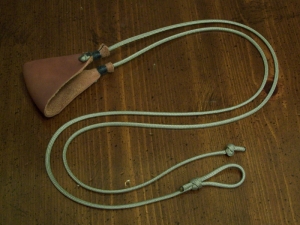
Here is the finished sling.
"So David prevailed over the Philistine with a sling and with a stone..." I Samuel 17:50
Home About Information & How To's Products Gallery Links Contact
Copyright by Timothy Potter