Home About Information & How To's Products Gallery Links Contact
Tutankhamun Sling Tutorial II
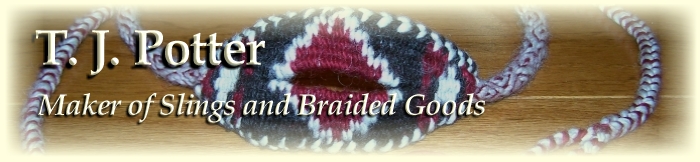
My first instructions for making a Tut sling showed the basic method of constructing a tapestry woven cupped pouch, by weaving an hourglass shape and subsequently tightening the warp to finish the shaping. I included some directions for using the technique to make a reproduction of one of the slings found in the tomb of Tutankhamun, but did not illustrate the process of making such a sling. I have put this tutorial together to show more clearly how such a sling can be made, as well as to demonstrate some techniques that I have learned since the time I made the first tutorial.
Contents:
Step 1: Warping the loom.
Step 2: Weaving the pouch.
Step 3: Tightening and finishing the pouch.
Step 4: Cords, loop, and finishing
Tools and Materials
For this sling you will need:
Approx. 75 yards of 10/2 linen thread (4 yards of white and 71 yards of natural)
Scissors
A needle, preferably blunt
A small weaving loom
In these illustrations I am using a peg loom I built for weaving this type of sling, and if you wish to make one of your own, you can try my Making a Tut Peg Loom instructions. In my other Tut sling tutorial I show how to use a simpler type of loom, which is more work to use, but is easier to make than a peg loom. Either loom can be used to make this sling.
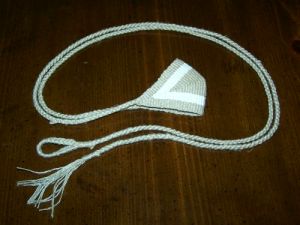
Step 1: Warping the loom.
NOTE: Since my first tutorial I have learned that when weaving Tut pouches and other diamond shaped sling pouches, the pouch will look slightly more symmetric if an odd number of warps are used. If you weave across an even-number of warps, the center of the pouch will lie between two warps, whereas with an odd number of warps, there is a warp at the center. Because of the over-under nature of weaving, a pouch with the center between two warps will not come out an even diamond, but will be just slightly crooked. This is not very noticeable, but since it is no more difficult to start with an odd number of warps than an even number, I would recommend using an odd number.
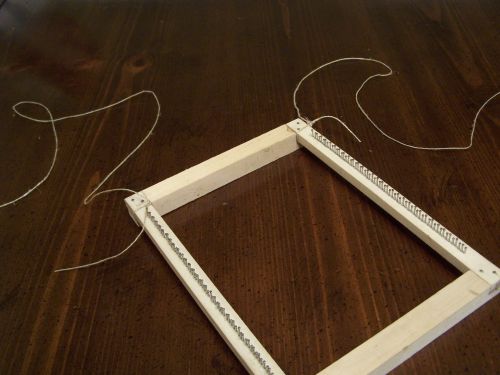
Begin by cutting two lengths of natural-colored thread each about 8 yards long to use for the warps. Tie each of these strands to the ends of the loom as shown.
Take one of the warps and bring it around the peg closest to it.
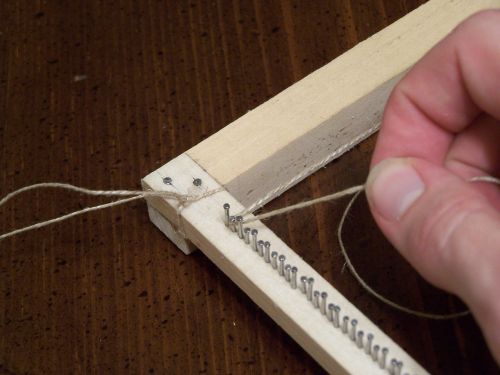
Next, bring this strand to the other side of the loom and around the second peg from the end.
Continue on by bringing the strand back and forth across the loom, going around every other peg. Make sure to pull the warp strand tight, and not to let what you've already done loosen up, or you can have problems keeping the weaving looking nice. Note in the picture how the warp only goes around every other peg.
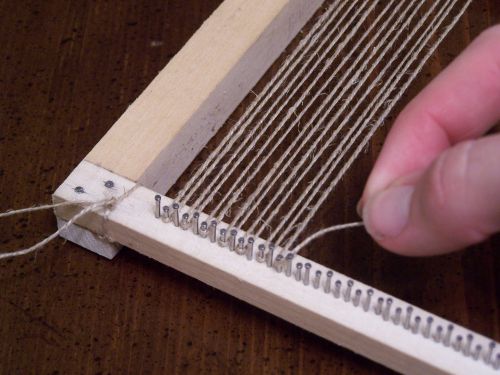
Keep going until you have a total of 51 warps. Then tie the end of the strand to a peg or to the loom frame. The reason the warp strand did not go around all the pegs is that the loom has 60 pegs, but for this sling only 51 warps are needed. (It is of course possible to make the sling with more or fewer warps, but for this size of linen thread, I like to use 51 warps)
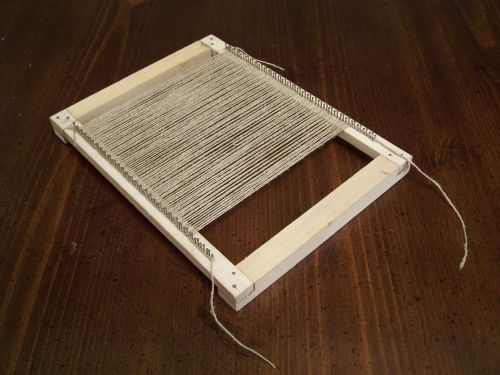
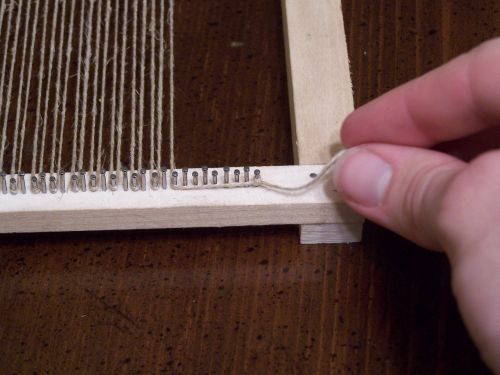
Now that one of the warp strands is done, go back and take the other strands and bring it back and forth in the same way as the first strand. Make sure to only go around the pegs that the first strand did not go around. Tie the end off in the same manner as the first strand. When this is finished, you should have 51 warps, each of which consists of 2 strands. Shown above is the loom completely warped.
"So David prevailed over the Philistine with a sling and with a stone..." I Samuel 17:50
Home About Information & How To's Products Gallery Links Contact
Copyright by Timothy Potter