
Home About Information & How To's Products Gallery Links Contact
Tut Tutorial II
Contents:
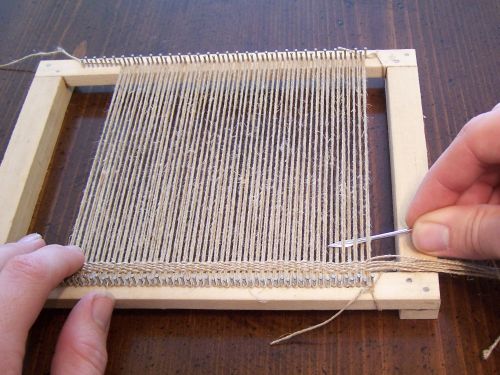
Step 1: Warping the loom.
Step 2: Weaving the pouch.
Step 3: Tightening and finishing the pouch.
Step 4: Cords, loop, and finishing
Step 2: Weaving the pouch.
To prepare for weaving the pouch, cut out the linen to use for wefts. You will need fourteen 3 1/2 yard, two 3 yard, and one 5 yard lengths of natural linen, as well as two 3 yard lengths of white linen. Before explaining how to weave the pouch, I will show some techniques I find useful for this kind of weaving.
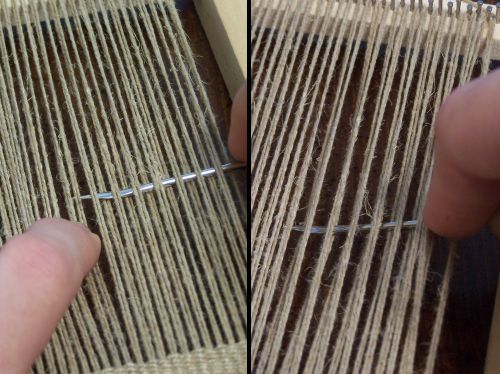
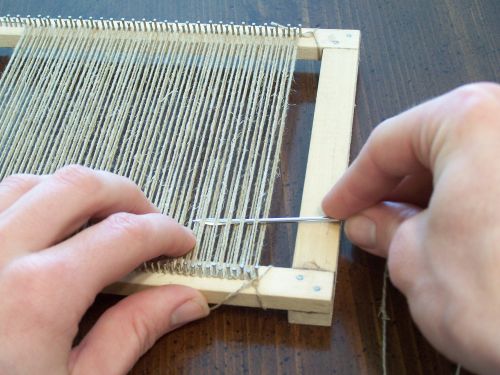
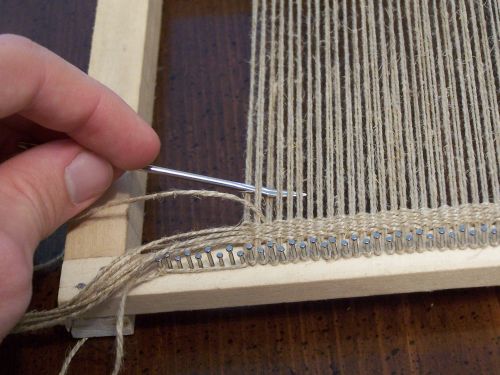
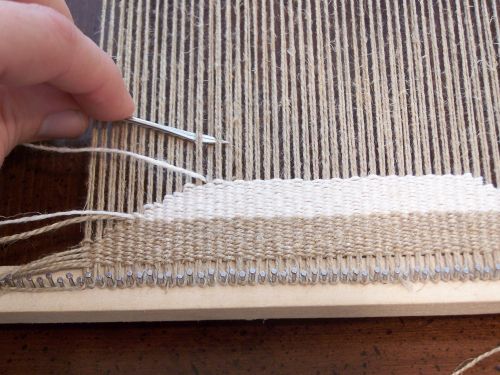
Here is shown the way I weave the weft through the warp using a needle. If I need to bring the needle over a warp (remember that the warp is doubled, so each warp is made of two strands), I push down on the warp ahead of the needle with my fingers, and then advance the needle over one warp as shown on the left. To go under with the needle, I tip the point of the needle downward, and push it under a warp. With practice, these two operations and be done in sequence fairly fast.
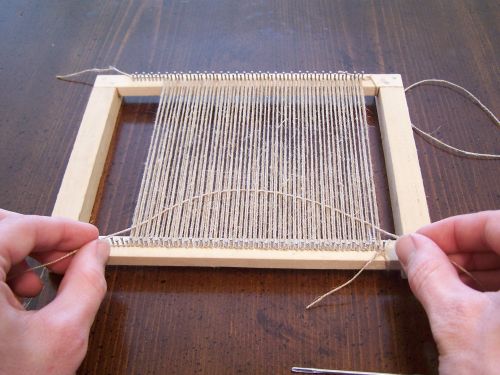
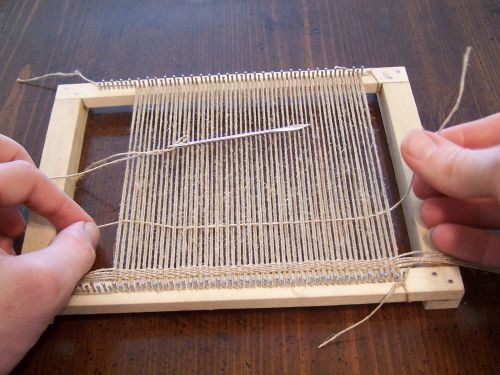
For this pouch, the weaving is what is called weft-faced, meaning that the weft is what is visible on the finished project. This is done by making the warp tight and straight, and making the weft go up and down around the warp as it is woven through. It is a common problem to make the weft too tight, and so here I will show the method I use to avoid that problem. When the weft has been woven through, pull on it so that it forms a large arc across the loom, as in the picture.
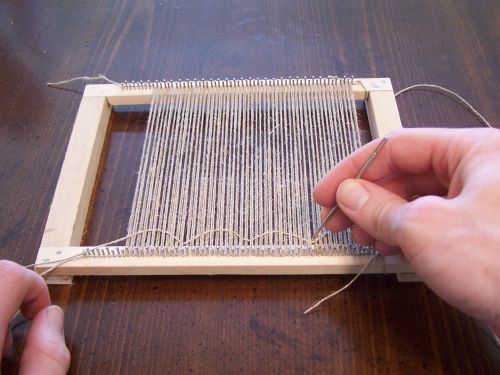
Next, using the needle, push on the weft at regular intervals to form a series of smaller arcs. This is known as bubbling the weft.

Finally, push the weft flat along the length of it. By bubbling the weft in this manner, the weft is not made too tight to have a good appearance when the pouch is finished.
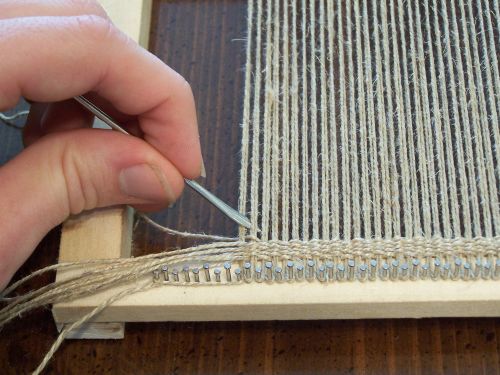
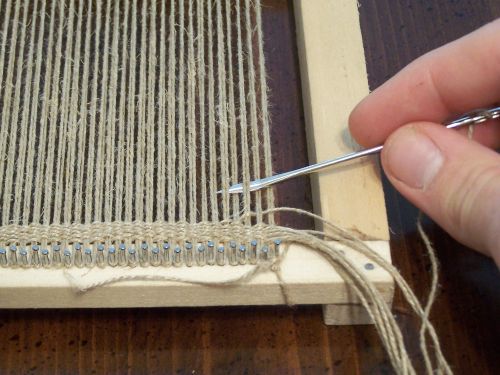
Here I have illustrated a mistake that can occur, which if not detected can lead to serious problems later on when the pouch is tightened. What has happened is that the needle was not brought all the way around the warp and poked through a warp strand, splitting the strand. This is a relatively easy mistake to make, but it can be hard to see if it is on the back side of the weaving, so be careful to clear the warp with the needle. If an extra precaution against this fault is desired, you can slide the weft up and down in the warp and watch to see if it is catching on anything, and if it is, make the correction before going on.
To begin weaving the pouch, the first step is to weave the strands that will later be braided into the cords. It is the fourteen 3 1/2 yard pieces that are used for this; seven of them are used now at the beginning of the weaving, and the remaining seven will be used at the end. To start, take one of these pieces and weave it through the warp going over-under-over-under as shown. Weave it all the way across the warp.
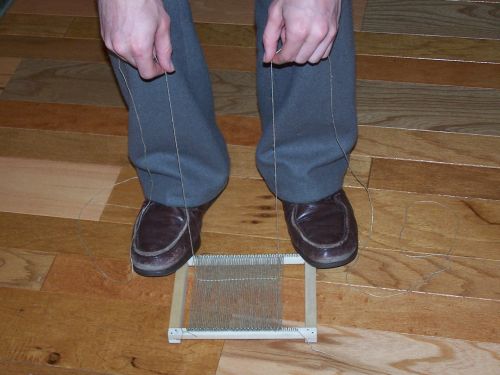
Once the strand is woven through, it needs to be pulled so that there is an equal length of it coming out both ends of the loom. One way to do this is do set the loom on the floor, stand on the edges of it to keep it from moving, and pull on the ends of the strand until they are even. When this is done, follow the directions above for bubbling the weft, and push the weft to the front of the loom.
Now take the second of the 3 1/2 yard strands and weave it through like the first, but be sure to start in the opposite manner (in this case the 1st strand started by going over the first warp, so this 2nd strand is started by going under). When the strand is woven through, even out the ends and bubble it just like the first.
Weave five more of the 3 1/2 pieces through the loom in the same manner as the first two, always remembering to start each one in the opposite manner from the previous one.
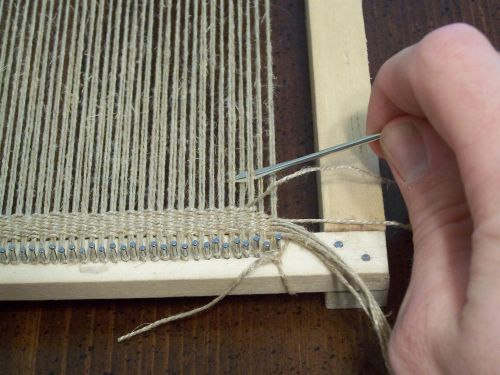
Now take one of the 3 yard lengths of natural linen and begin to weave it through. Again, start it in the opposite manner of the last strand you wove through.
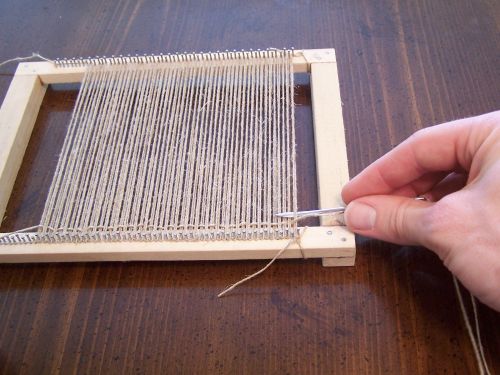
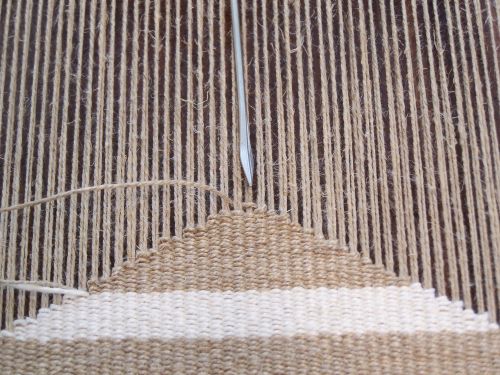
This time, when you have woven through all the warps, instead of evening out the ends, pull it trough until only about 4-5 inches is left on the side it was started on, as in the picture. Then bubble it and push it against the rest of the weaving.
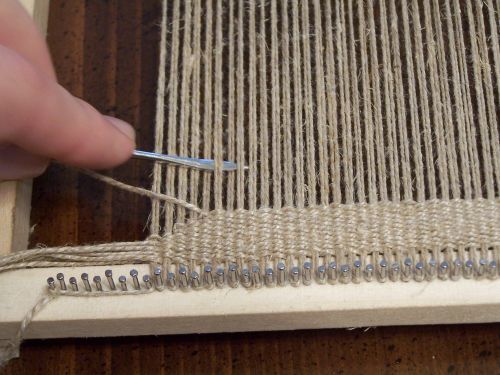
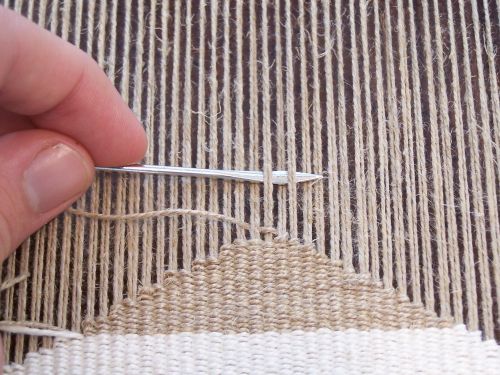
Now, using the same strand, turn and weave back through the other way. Make sure to start by going around the end warp as shown. From this point on, the weaving will be done in this back and forth manner until the other side of the pouch is reached. Remember to keep bubbling the weft each time you weave through the warp.
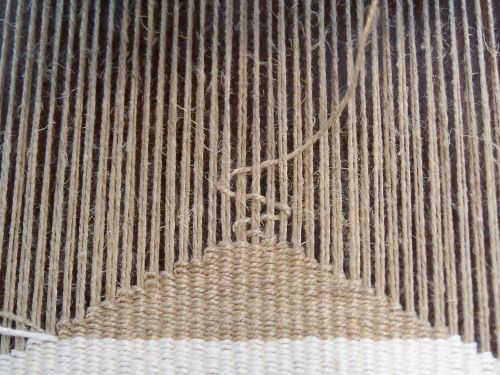
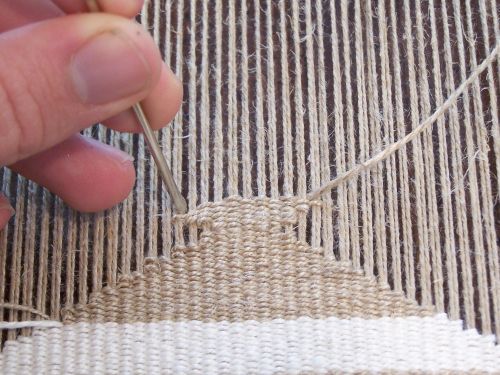
In order to form the cupped shape of the pouch, the number of warps woven through is decreased as you weave towards the center of the pouch, and right now the first decrease is made. As you begin to weave back across the warp, skip the end warp and go around the 2nd warp from the end instead.
The next decrease is made at the left side of the warp, and is done the same way, by going around the 2nd warp from the end as shown above. Weave two more rows like this, decreasing one warp each time, which will make a total of four decreases, two on each side of the loom.
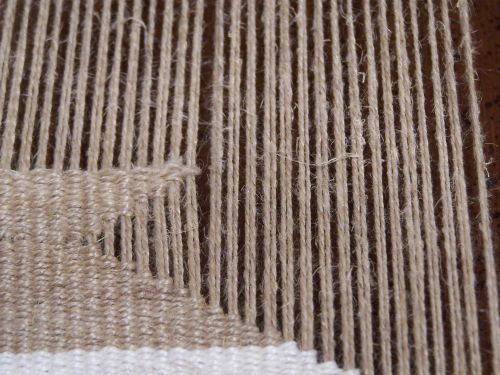
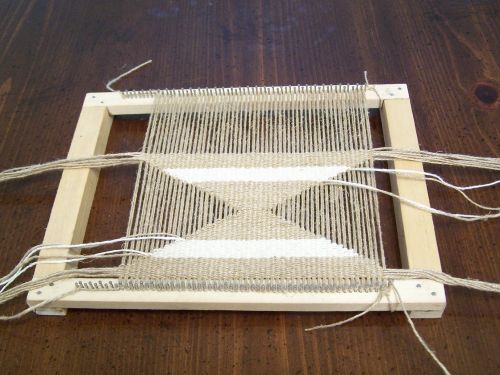
Here you can see the two decreases made on this side of the loom, and the next row, the one being started in the picture, is done without making a decrease. The next row after this, the one coming back to this side again, is also made without a decrease. This six row decrease pattern of decrease-decrease-decrease-decrease-don't-don't is repeated until the center of the pouch is reached.

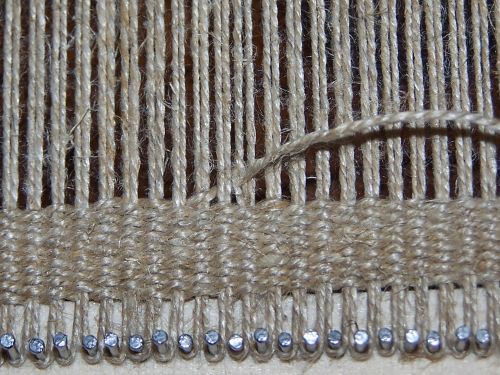
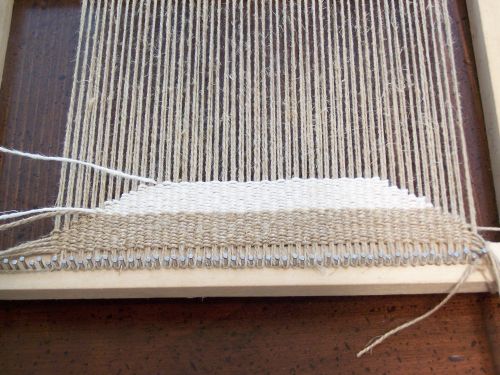
Continue with the pattern until you have woven with this weft for 13 rows. These 13 rows plus the 7 strands woven at the beginning make a total of 20 rows. You are now ready to change colors and weave the white stripe. Start by cutting the end of the natural weft, leaving 4-5 inches as a tail.
Thread one of the white linen strands onto the needle and, acting as though it was a continuation of the natural colored weft by weaving it where the natural would have gone, weave back through the warps, beginning as shown above.
Continuing the same decrease pattern as before, weave 20 rows of white.
Now you are ready to switch back to the natural color for the center of the pouch. Use the 5 yard length for this part. Start it like the white was started, by acting like it is a continuation of the white, as illustrated above.
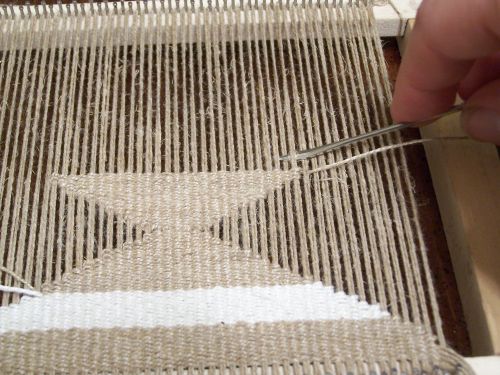
Continue with the decrease pattern until you are only weaving through 3 warps as shown (the needle is marking the center warp). This is the center of the pouch. Now, instead of decreasing, you will begin to increase. Since the pouch is symmetrical, the pattern for the increases is the same as for the decreases. One thing that makes the increases easier to keep track of than the decreases is that to know whether or not at a certain point you should increase, simply look down at the first half of the pouch and see if a decrease was made at that point, since you will increase at the same points that you decreased at.
Here is how the first row of the 2nd half of the pouch is woven. Instead of going across three warps, which would be going over-under-over, an increase is made at the end of the row so the pattern is over-under-over-under, and four warps are crossed.
Illustrated here are the first three rows of the 2nd half expanded so you can see how the increases have been made.

Now, after several rows of the increase pattern, you can see how it is beginning to look like a mirror image of the first half of the pouch.
As the width of this half of the pouch increases, it can be difficult to keep the leading edge of the weaving straight. Shown above is what happens if you push too hard against the weaving. Be careful to avoid this, but if you notice the weaving becoming crooked, push it back into place before going on. Otherwise, the two halves of the pouch won't match.
Another easy mistake to make is to pull the wefts too tight, which will start to form gaps in the warp. This can be avoided by making looser bubbles with the weft, but if not corrected it will result in a deformed pouch in the final sling.
Weave until you have the same amount of natural on this half of the pouch as on the first half. Note in the picture that you should end up with the tail of the weft on the opposite side of the loom than it was started on. Now take the other white strand and begin weaving with it, once again starting it like a continuation of the natural strand.
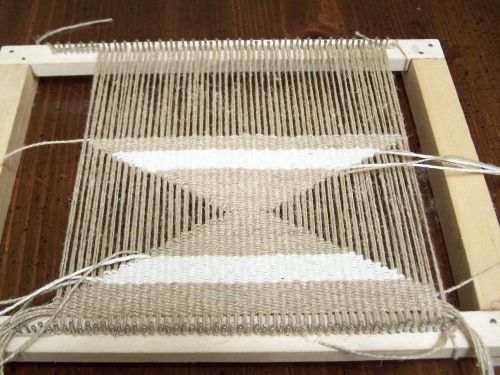
Since the pouch is symmetrical, weave 20 rows of white before going back to natural, and then weave 13 rows of natural. Keep up the increase pattern, and it should come out looking like the picture above.
Now weave through the seven remaining 3 1/2 yard strands, making sure to pull the ends even like the first seven. This completes the weaving of the pouch.
"So David prevailed over the Philistine with a sling and with a stone..." I Samuel 17:50
Home About Information & How To's Products Gallery Links Contact
Copyright by Timothy Potter